
Sauces & Condiments
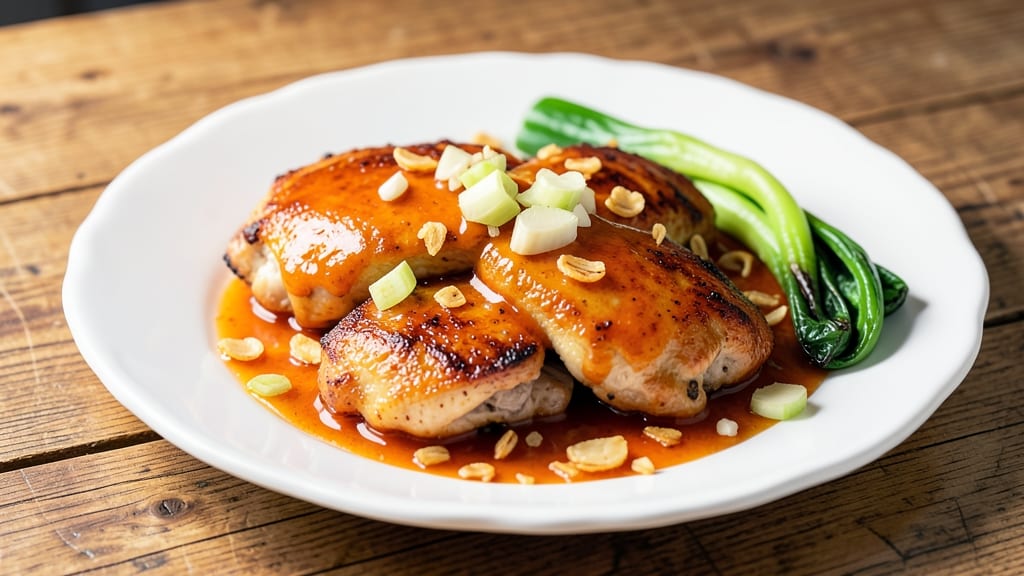
This Aldi orange chicken sauce delivers that signature sweet-spicy balance in just 15 minutes using pantry staples you already own.
The secret lies in balancing honey, soy sauce, and orange juice for a glaze that's tangy yet rich—perfect for tossing with chicken, drizzling over rice, or serving as a dipping sauce.
I developed this recipe after craving that restaurant-quality flavor without the markup, and it's become a weekly staple in my kitchen.
The beauty of this sauce is its versatility—it works as a glaze for crispy chicken tenders, a dip for spring rolls, or even a marinade for tofu. The combination of orange juice and vinegar brightens the sauce, while ginger and garlic add depth that stands up to any protein.
What makes it special is how simple it is to customize: add a pinch of red pepper flakes for extra heat or a splash of sesame oil for nutty richness.
What you'll end up with is a glossy, aromatic sauce that clings beautifully to food while delivering that perfect sweet-spicy kick. The best part?
It keeps well in the fridge for up to 2 weeks or freezes for 3 months, so you can make a big batch and have it ready whenever cravings strike. This isn't just a sauce—it's a flavor game-changer that transforms ordinary meals into something extraordinary.
Whether you're prepping for a weeknight dinner or meal prepping for the week, this sauce delivers restaurant-quality results with minimal effort. The ingredients are simple, the process is straightforward, and the results are undeniably delicious. Let's get started on making this versatile glaze that will become your new go-to sauce.
Ingredients for aldi orange chicken sauce
Pantry staples that transform into a restaurant-worthy sauce in minutes—no fancy ingredients needed.
| Ingredient | Amount | Notes |
|---|---|---|
| Orange Juice 🍊 | ½ cup | Freshly squeezed preferred |
| Honey 🍯 | ¼ cup | Light or wildflower variety |
| Soy Sauce 🍶 | ¼ cup | Light or all-purpose |
| Rice Vinegar 🍶 | ¼ cup | White or seasoned |
| Fresh Ginger 🌿 | 1 tbsp | Grated, fresh preferred |
| Garlic Cloves 🧄 | 3 cloves | Minced, fresh preferred |
| Sesame Oil 🫒 | 1 tbsp | Toasted, for aroma |
| Red Pepper Flakes 🌶️ | ½ tsp | Adjust for heat preference |
| Cornstarch 🌾 | 1 tbsp | For thickening |
| Water 💧 | 2 tbsp | For slurry |
| Salt 🧂 | ½ tsp | Kosher or sea salt |
The orange juice is the star—freshly squeezed makes all the difference, but bottled works in a pinch. Trader Joe's has the best-priced fresh juice if you want to splurge, but any brand is fine. Honey should be light and smooth—wildflower or clover adds subtle floral notes. For the ginger, buy a small knob at the store and grate only what you need (it loses flavor fast). The garlic can be pre-minced, but fresh is worth the extra minute—it adds depth that jarred garlic can't match. Sesame oil might be pricey, but a little goes a long way—just a teaspoon for aroma, more if you want that nutty richness.
No fresh ginger? Powdered works at half the amount, but you'll miss that bright zing. Out of sesame oil? A splash of peanut oil gives a similar toasty aroma. Want it sweeter? Add 1 extra tablespoon of honey. Need more tang? Swap half the orange juice for lime juice. The red pepper flakes are optional—leave them out for mild heat or double for extra kick. Cornstarch is key for that glossy finish—don't skip it, or the sauce will stay thin. For a smoother texture, blend the sauce after cooking for 10 seconds.
This sauce keeps 2 weeks in the fridge—store it in a jar with a tight lid. For freezing, portion into ice cube trays and transfer to a bag. Thaw overnight in the fridge, then stir to re-emulsify. The flavor actually improves after 2-3 days as everything melds together. Double the batch—it disappears fast on crispy chicken, noodles, or even as a marinade for tofu. Leftovers make an amazing dipping sauce for spring rolls or egg rolls too.
Why You'll Love This Recipe
- Pantry Magic: I swear by this sauce because it uses things I already have—no specialty shopping required. That jar of rice vinegar, the ginger root I forgot about, even the honey I keep for tea? Suddenly, they’re all working together in a way that’s actually impressive.
- Bright & Tangy Fix: The orange juice cuts through the richness of the soy sauce, while the ginger adds this zingy warmth that sticks with you. Honestly, it’s the kind of flavor that makes you pause mid-bite, like, “Wait, why haven’t I done this before?”
- Weeknight & Takeout: Slather it on chicken thighs for a quick dinner, drizzle it over rice for lunch the next day, or toss it with noodles when you’re craving something fast. Between us, it’s my go-to for when I need to feed a crowd but don’t want to slave over a recipe.
- Leftovers That Shine: This sauce doesn’t skimp on flavor, so it tastes just as good reheated as it does fresh. I’ve used it to jazz up stir-fries, even as a marinade for shrimp—proof that a little goes a long way when it’s this good.
Step-by-step instructions for Aldi orange chicken sauce
This vibrant glaze comes together faster than you'd think—just combine these pantry staples for a perfect balance of sweet, tangy, and spicy.
Build the Base with Orange Juice and Honey
In a medium saucepan, combine the 0.5 cup orange juice and 0.25 cup honey over medium heat. Bring to a gentle simmer, which should take about 3-4 minutes. You'll see tiny bubbles forming around the edges—this signals the liquid is heating through without boiling over.
I like to stir occasionally with a wooden spoon, watching as the honey begins to dissolve completely into the orange juice. This step develops the sweet foundation of your sauce, so let it simmer until the mixture feels smooth and cohesive. The aroma alone will make your kitchen smell amazing—like a mix of citrus and caramel.
Add Aromatics and Acid Balance
Once the orange juice and honey mixture is smooth, add the 0.25 cup soy sauce, 0.25 cup rice vinegar, 1 tbsp grated fresh ginger, 3 minced garlic cloves, and 0.5 tsp salt. Stir everything together and let it simmer for 5-6 minutes until the liquid reduces slightly and the aromatics become fragrant.
Here's where the magic happens—the ginger and garlic will soften slightly, releasing their oils into the sauce. You'll notice the mixture darkening a bit and developing a complex aroma that's both sweet and savory. If you smell the garlic burning, reduce the heat immediately—it should be fragrant but not bitter.
Incorporate Heat and Oil
Lower the heat to medium-low and stir in the 1 tbsp sesame oil and 0.5 tsp red pepper flakes. The sesame oil adds a nutty aroma, while the red pepper flakes bring the heat. Let the sauce simmer for another 3-4 minutes, stirring occasionally to distribute the flavors evenly.
This is the moment that matters: the sauce should now have a beautiful balance of sweet, tangy, and spicy flavors. Taste it carefully—you might want to adjust the heat by adding more red pepper flakes if you prefer it spicier, or a touch more honey if you want it sweeter. Real talk: this is where most home cooks make their first adjustment, so don't be afraid to tweak it to your taste.
Thicken the Sauce to Perfection
In a small bowl, whisk together the 1 tbsp cornstarch and 2 tbsp water to create a smooth slurry. Slowly pour this mixture into the saucepan while stirring constantly. The sauce will begin to thicken almost immediately—keep stirring for 2-3 minutes until it reaches your desired consistency.
You're looking for a glaze that coats the back of a spoon but isn't so thick it becomes paste-like. If it thickens too quickly, add a splash of water to loosen it. The sauce should be glossy and ready to coat your chicken beautifully. I know it seems weird to add cornstarch, but trust me—it's what transforms this simple sauce into something restaurant-worthy.
Pro Tips For Making Aldi Orange Chicken Sauce
- Simmer, Don’t Boil: I learned this the hard way—when you reduce the sauce, keep the heat at a gentle simmer (medium-low). Boiling turns the orange juice bitter and makes the honey clump like glue. Watch for tiny bubbles breaking the surface, not a full-on rolling boil.
- Grate Ginger Fine: Fresh ginger adds that bright kick, but chunky pieces just sit there like forgotten garnish. Use the smallest holes on your grater or pulse it in a food processor until it’s almost paste-like. This way, every spoonful of sauce gets that zesty warmth without hunting for texture.
- Balance the Vinegar: Rice vinegar is the sneaky ingredient that can turn your sauce sharp or flat. Start with half the amount listed, taste, then add the rest gradually. I’ve ruined batches by dumping it all in at once—now I adjust as I go, especially if using a strong vinegar.
- Strain the Sauce: After simmering, let the mixture cool slightly, then strain it through a fine-mesh sieve. This catches any lingering ginger fibers or honey lumps, giving you a silky finish. (Yes, it’s an extra step, but your sauce will taste like it came from a restaurant.)
Common mistakes when making this recipe
Boiling Too Fast
Watch out for bringing the sauce to a full boil—this can scorch the delicate flavors of ginger and garlic. I’ve seen many first-timers rush this step and end up with bitter-tasting sauce. Instead, keep the heat at medium and let it simmer gently.
If you notice the sauce bubbling vigorously, reduce the heat immediately. The goal is a slow, even cook that develops flavors without burning. 🌡️
Skipping the Slurry
The cornstarch slurry is non-negotiable for that perfect glaze consistency. I’ve had people try to thicken the sauce by simmering it longer, but that often leads to a grainy texture or even separation.
The slurry ensures a smooth, glossy finish. Mix it thoroughly before adding to avoid lumps—1 tbsp cornstarch + 2 tbsp water is the magic ratio. Stir constantly while pouring to prevent clumping.
Over-Salting Early
Adding all the salt at once can make your sauce taste flat or overly salty as the flavors develop. I recommend adding just ½ tsp initially and tasting as you go.
The soy sauce already contributes saltiness, so you might not need the full amount. Adjust gradually—you can always add more, but you can’t take it out. Trust your taste buds here!
Ignoring the Resting Time
After making the sauce, let it sit off the heat for 5-10 minutes before using. This allows the flavors to meld together beautifully. I’ve rushed this step before and ended up with a sauce that tasted disjointed.
The resting time also lets the cornstarch fully set, giving you that perfect glaze texture. Cover the saucepan with a lid to trap the aromas and enhance the flavor development.
Using Low-Quality Ingredients
Don’t skimp on the orange juice or honey—cheap, artificial-tasting versions will ruin your sauce. I always use freshly squeezed orange juice (or the best bottled brand like Tropicana Pure) and light honey (like Manuka or clover).
The same goes for soy sauce—light or all-purpose brands like Kikkoman work best. These ingredients make all the difference in achieving that restaurant-quality taste. 🍯
Not Adjusting to Taste
Every kitchen is different, so your sauce might need tweaking. Don’t be afraid to add a pinch more red pepper flakes for heat or a splash of orange juice if it’s too thick.
I often adjust the balance between sweet and tangy by adding a bit more rice vinegar or honey after tasting. The beauty of this recipe is its flexibility—make it your own! 🔥
Nutrition facts
Frequently asked questions
Can I make this sauce without cornstarch?
You can try using 1 tbsp arrowroot powder instead—it works similarly for thickening. For a cornstarch-free version, simmer the sauce longer (up to 10 minutes) to reduce naturally, but the texture won't be as glossy. The cornstarch creates that perfect restaurant-style glaze, so it's worth having on hand.
How spicy should the sauce be?
The recipe starts with ½ tsp red pepper flakes for mild heat, but you can adjust to taste. For medium heat, use 1 tsp, and for spicy, try 1½ tsp. Remember, you can always add more later—just stir in a pinch while warm. The sauce freezes beautifully, so you can make a batch with extra heat if you love spice.
Can I substitute honey with maple syrup?
Yes! Use the same amount of maple syrup as honey, but reduce the orange juice by 1 tbsp to balance the liquid. Maple adds a deeper caramel flavor that pairs beautifully with the citrus. For a lighter sweetness, try agave syrup instead—it's neutral and works well in equal amounts.
How do I use this sauce beyond chicken?
This versatile glaze works on tofu, shrimp, pork tenderloin, or even roasted vegetables like broccoli or carrots. Drizzle it over rice, noodles, or use it as a dipping sauce for spring rolls. For extra richness, brush it on baked potatoes or toss it with stir-fried greens. The possibilities are endless!
Why did my sauce separate?
Separation usually happens if you didn't stir constantly while adding the cornstarch slurry or if the sauce boiled too vigorously. To fix it, whisk in 1 tsp water while heating gently on low until smooth. For prevention, always mix the slurry thoroughly and add it slowly while stirring. The sauce should thicken evenly without clumping.