
Main Courses
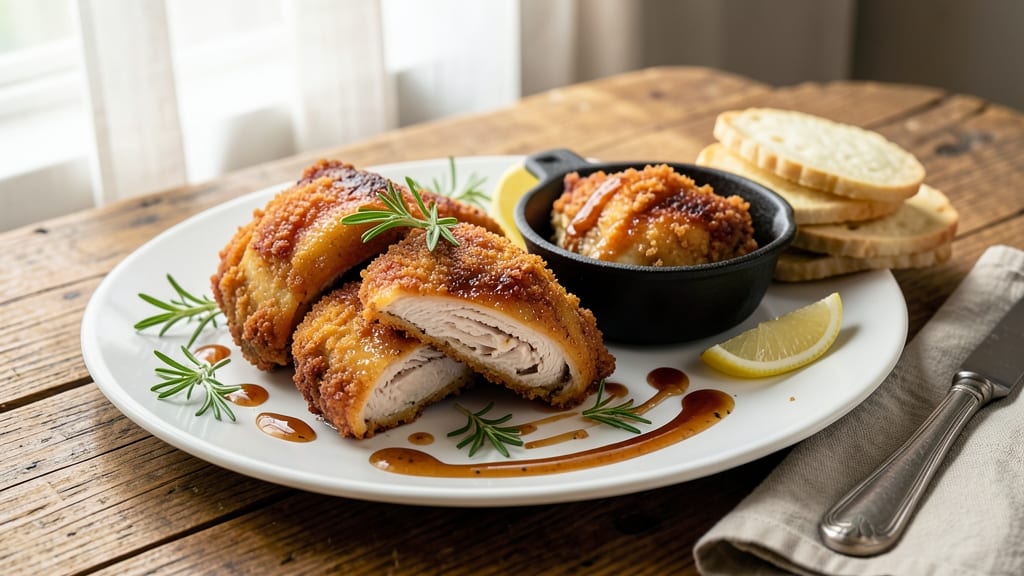
This Amish oven fried chicken recipe delivers the same golden, crispy perfection as a deep fryer—without the mess or grease. The secret lies in a hybrid stovetop-to-oven technique that creates a crispy crust while keeping the meat juicy inside.
I first learned this method from an Amish neighbor who swore by lard for frying, and it’s become my go-to for Sunday dinners. The process starts with a simple buttermilk marinade and a triple breading that locks in moisture while creating that signature crunch.
Unlike traditional frying, this method uses a Dutch oven or cast iron skillet to render fat and crisp the chicken, then finishes in the oven for even cooking. It’s a foolproof technique that works every time, even for beginners.
By the time you pull that chicken from the oven, you’ll have restaurant-quality results—crispy, golden-brown skin that shatters at the touch, with tender meat underneath. The aroma alone will have everyone gathered at the table, and the leftovers? They’re even better the next day, reheated until crispy again.
Serve with classic Amish sides like mashed potatoes, creamy gravy, or tangy coleslaw for a meal that feels like a homecoming. Here’s how to make it.
Ingredients for amish oven fried chicken
The secret to Amish oven fried chicken lies in these twelve ingredients—lard for crispiness, buttermilk for tenderness, and a triple breading for that signature crunch.
| Ingredient | Amount | Notes |
|---|---|---|
| Chicken Thighs 🍗 | 1 ½ lb | Bone-in, skin-on preferred |
| Buttermilk 🥛 | 1 cup | Full-fat for best flavor |
| All-Purpose Flour 🌾 | 2 cups | White flour for light crust |
| Cornstarch 🌾 | ½ cup | For extra crispiness |
| Lard 🧈 | ½ cup | Traditional Amish method |
| Vegetable Oil 🫒 | ¼ cup | For extra crispiness |
| Salt 🧂 | 2 tbsp | Kosher or sea salt |
| Black Pepper 🌶️ | 1 tbsp | Freshly ground preferred |
| Garlic Powder 🧄 | 1 tbsp | For flavor depth |
| Onion Powder 🧅 | 1 tbsp | For savory base |
| Paprika 🌶️ | 1 tbsp | Smoked for color |
| Dried Parsley 🌿 | 1 tbsp | For fresh finish |
The lard is non-negotiable here—it’s what gives this chicken that legendary crispy crust. Rendered pork lard works best, and you’ll find it in the baking aisle at Walmart or Kroger (look for the 16-ounce tub). If you can’t find lard, shortening or bacon fat will work in a pinch, but the flavor won’t be quite the same. Chicken thighs are key—they stay juicier than breasts during the long cooking process. Bone-in, skin-on is ideal, but boneless thighs work too if that’s what you’ve got. For the buttermilk, full-fat is a must—it adds richness that low-fat versions can’t match.
No lard? Shortening or bacon fat will get you close, but the texture won’t be identical. Running short on buttermilk? Substitute with 1 cup milk plus 1 tablespoon vinegar or lemon juice—let it sit for 5 minutes to curdle. The triple breading is where the magic happens: start with flour, then cornstarch for extra crispiness, and finish with seasoned breadcrumbs. If you don’t have cornstarch, extra flour at the same amount will work, but the crust might not be quite as crisp. For the spices, Diamond Crystal kosher salt dissolves better than table salt, and freshly ground black pepper makes all the difference. The dried parsley adds a fresh finish—if you’ve got fresh, use half the amount.
This chicken reheats beautifully—just pop it in a 350°F oven for 10-15 minutes until crispy again. Store leftovers in the fridge for up to 3 days, or freeze for 3 months (wrap tightly in foil to keep it crisp). The breading absorbs moisture fast, so don’t skip the foil. For extra crispiness, broil for 2 minutes at the end. This recipe makes enough for a crowd—plan on 2 pieces per person if you’re serving it as the main dish.
Why You'll Love This Recipe
- No Flour Fuss: I swear by this method—just dump the flour and cornstarch mix into a bag, shake the thighs in there, then dump it all straight into the hot lard. No measuring, no mess, no stress. The secret’s in that double-dredge: first in buttermilk, then back through the dry mix. That’s where the magic happens.
- Crispy-Creamy Payoff: Honestly, the lard makes this ridiculously crispy—like, shatter-your-chips kind of crunch—while the buttermilk keeps the inside juicy. It’s that perfect contrast: golden crust outside, tender meat inside. My husband always says it’s the only fried chicken worth making.
- Leftovers? No Problem: This recipe actually improves the next day. The crust stays crispy (thanks to that cornstarch trick), and it reheats in the oven in minutes. I pack it for lunches or freeze half for lazy nights. Even my picky kid grabs seconds—no joke.
- Budget-Friendly Feast: Chicken thighs are cheaper than breasts, and lard? It’s dirt compared to shortening or oil. A single batch feeds four with room for sides, and the leftovers stretch into sandwiches or salads. Plus, no fancy ingredients—just pantry staples. My wallet and my family win.
Step-by-step instructions for Amish oven fried chicken
Here's the method for achieving that legendary Amish-style crispy crust without deep-frying.
Prepare the Chicken and Buttermilk Marinade
Pat the 1.5 lb chicken thighs completely dry with paper towels—this is crucial for an even crust. Place them in a shallow dish and pour the 1 cup buttermilk over them, ensuring each piece is fully submerged. Let them marinate uncovered in the refrigerator for at least 4 hours or overnight. The acid in the buttermilk tenderizes the meat, while the fat helps create that signature crispy coating.
I like to flip the thighs halfway through marinating to ensure even coating. If you're short on time, you can marinate for just 2 hours at room temperature, but the longer it sits, the more flavorful the result. The skin should look slightly opaque when ready—this indicates the buttermilk has worked its magic.
Make the Crispy Breading Mixture
In a large bowl, whisk together the 2 cups all-purpose flour, 0.5 cup cornstarch, 2 tbsp salt, 1 tbsp black pepper, 1 tbsp garlic powder, 1 tbsp onion powder, 1 tbsp paprika, and 1 tbsp dried parsley. The cornstarch is key here—it adds that extra crunch that makes Amish fried chicken stand out. Mix thoroughly to distribute all the seasonings evenly.
In a separate small bowl, combine the 0.5 cup lard and 0.25 cup vegetable oil. The lard provides that traditional Amish flavor and helps create the ultra-crispy crust, while the vegetable oil adds extra crispiness. Warm this mixture slightly in the microwave for 10-15 seconds to make it easier to work with—just until it's soft enough to stir easily, but not melted.
Dredge the Chicken in the Breading
Remove the chicken from the buttermilk, letting any excess drip off. Working in batches if needed, dip each piece into the warm lard-oil mixture, coating it thoroughly. Then immediately press it into the flour mixture, turning to coat all sides completely. I press firmly with my fingers—this ensures the breading sticks well and creates that thick, crispy crust. Place the coated chicken on a wire rack set over a baking sheet to keep pieces separate.
Let the breaded chicken rest for 10 minutes before baking. This resting period allows the breading to adhere better and prevents it from falling off during cooking. The chicken should look like it's wearing a thick, golden armor—this is your promise of crispy perfection.
Bake for Extra-Crispy Results
Preheat your oven to 425°F and position a rack in the lower third of the oven. Line a second baking sheet with parchment paper. Bake the chicken for 20 minutes, then carefully flip each piece and transfer to the prepared baking sheet. Return to the oven and bake for another 15-20 minutes until the crust is deep golden brown and crispy, and the internal temperature reaches 165°F.
The two-stage baking process is what creates that signature Amish texture—first baking builds the crust, then flipping ensures even browning on all sides. Don't be tempted to open the oven door early—each time you do, you risk losing heat and steam, which can make the crust soggy. The chicken is done when it's golden and the breading is so crispy it sounds hollow when tapped.
Rest and Serve
Transfer the chicken to a cutting board and let it rest for 5 minutes before serving. This brief rest allows the juices to redistribute, ensuring each bite is moist and flavorful. Serve immediately while the crust is at its crispy best—it won't stay that way for long!
The result should be golden-brown, ultra-crispy chicken with a savory, slightly spicy crust that shatters with every bite. The meat inside should be tender and juicy, with just the right amount of seasoning from the marinade and breading. This method delivers that classic Amish fried chicken experience without the need for deep-frying—perfect for a weeknight dinner or special gathering.
Pro Tips For Making Amish Oven Fried Chicken
- Dry the Thighs First: Pat those thighs bone-dry with paper towels before buttermilk—wet skin traps moisture and ruins the crust. I learned this the hard way when my first batch came out soggy, no matter how much cornstarch I added.
- Use Lard, Not Oil: Lard’s higher smoke point and fat content make the crust actually crispy, not greasy. I tried shortening once—it worked, but lard’s flavor wins. Render it fresh if possible, or use leaf lard if you’re in a pinch.
- Bread Twice, Rest Once: Dip thighs in buttermilk, then coat with flour/cornstarch mix once, let sit 10 minutes, then dip again. Skipping the rest = a crumbly, uneven crust. Trust me, the wait guarantees a shatteringly good bite.
- Start Hot, Finish Slow: Bake at 425°F for 20 minutes to set the crust, then drop to 350°F for another 20. Rushing the second phase makes the lard pool instead of crisping. My grandmother called it "the patience step"—she wasn’t wrong.
Common mistakes when making perfect results
Over-Marinating Risks
The buttermilk marinade is key for tenderness, but leaving chicken in too long—more than 12 hours—can make the meat mushy. I’ve seen this happen when people forget about their chicken overnight.
The acid in buttermilk breaks down proteins, and after a certain point, it starts working against you. Stick to 4-12 hours for perfect results. 🧂
Skipping the Resting Step
Rushing to serve the chicken right after baking is a big mistake. The 5-minute rest after baking lets juices redistribute, so cutting into it too soon means dry meat. I’ve learned this the hard way—once, I served it immediately and had to apologize to my guests!
Place chicken on a wire rack to let air circulate for that crispy finish. ⏰
Uneven Breading
If your breading falls off during cooking, you likely didn’t press it firmly enough. The secret is coating the chicken thoroughly with the lard-oil mixture first, then pressing it into the flour mixture.
I use my fingers to really work the breading into every crevice. Also, don’t skip the 10-minute rest before baking—it helps the breading adhere better. 🍗
Opening the Oven Door
Every time you peek at your chicken, you risk losing heat and steam, which can make the crust soggy. The two-stage baking process relies on maintaining a steady temperature.
I’ve found that setting a timer and avoiding temptation is key. The chicken is done when it’s golden and crispy—no need to check until then! 🔥
Using Wrong Fat
While vegetable oil works, it won’t give you that classic Amish flavor. The lard is non-negotiable for that rich, crispy texture. If you can’t find lard, shortening or bacon fat are decent substitutes, but they won’t be identical.
I’ve tried using all vegetable oil, and while it’s crispy, it lacks that traditional depth of flavor. 🧈
Overcrowding the Pan
Crowding the chicken in your Dutch oven or skillet leads to uneven cooking and steaming, which makes the crust soggy. Work in batches if needed, and give each piece space to crisp up properly.
I use a wire rack over a baking sheet to keep pieces separate and ensure even browning on all sides. 🍽️
Nutrition facts
Frequently asked questions
Why does Amish fried chicken use lard instead of oil?
The lard gives that signature crispy texture and rich flavor traditional to Amish cooking. It has a higher smoke point than butter and creates a more stable crust that stays crispy longer. Many Amish families use lard because it's a natural byproduct of their livestock, aligning with their self-sufficiency values.
Can I make this with chicken breasts instead of thighs?
You can try, but thighs work best because they stay juicier during the long baking time. If you use breasts, reduce baking time by 5-10 minutes and check for doneness at 160°F internal temperature. The crust will still be crispy, but the meat might be slightly drier.
How do I keep the chicken crispy when reheating?
Reheat in a 400°F oven for 10-15 minutes on a wire rack to restore crispiness. Store leftovers in the fridge for up to 3 days (wrapped in foil) or freeze for 3 months. For extra crunch, broil for 2 minutes at the end of reheating.
What's the best way to serve this Amish fried chicken?
Classic Amish sides include creamy mashed potatoes, homemade gravy, and tangy coleslaw. For extra flavor, serve with buttery cornbread or a simple green salad. The crispy chicken pairs perfectly with anything that balances its richness.
Can I make this recipe in an air fryer instead?
Yes! Use the same breading method, then air fry at 375°F for 12-15 minutes, flipping halfway. You may need to spray with oil halfway through for extra crispiness. The air fryer version cooks faster but may not be quite as crispy as the oven method.