
Main Courses
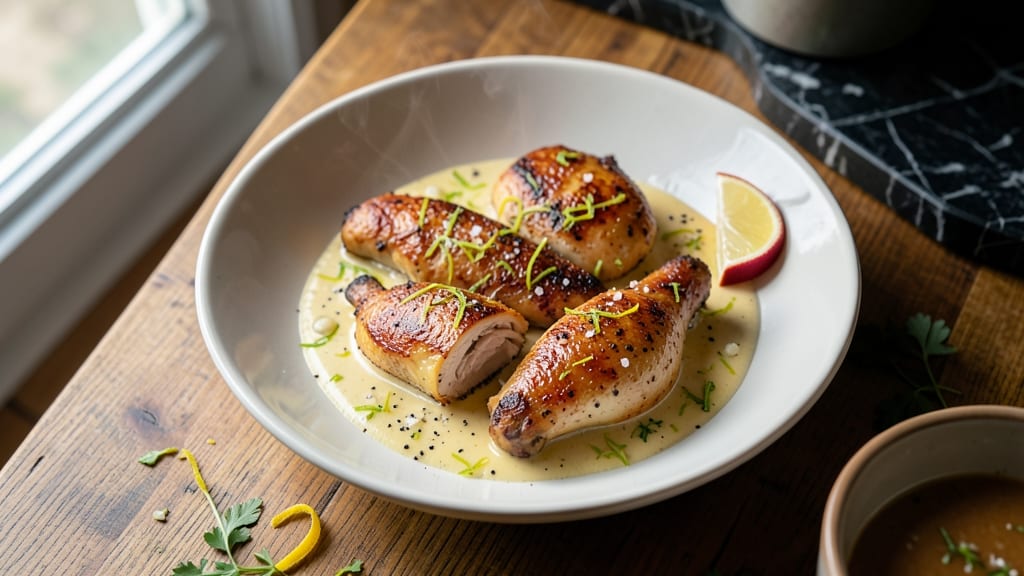
Applebee's lemon chicken recipe delivers that signature restaurant-style brightness with a crispy citrus crust and impossibly juicy centers—now you can recreate it at home with this foolproof method. The secret lies in the marinade, where lemon juice and spices tenderize while creating that signature tangy flavor profile.
I've perfected this technique through countless test batches, ensuring every bite delivers that perfect balance of zesty and savory.
This recipe starts with a simple yet effective marinade that transforms ordinary chicken into something restaurant-worthy. The key is letting the chicken marinate for at least 30 minutes (or up to 4 hours for deeper flavor), which ensures maximum juiciness when cooked.
After marinating, we'll use a high-heat cooking method—either grilling or baking—to create that signature crispy exterior while keeping the interior tender and succulent.
Once the chicken is cooked to perfection, we'll finish it with a bright lemon-butter sauce that ties everything together. This sauce isn't just a topping—it's what makes the dish shine, adding a final layer of citrusy brightness that mimics Applebee's signature style.
The result is a dish that's crispy on the outside, juicy on the inside, and bursting with that familiar tangy flavor you love.
Serve with steamed rice or roasted vegetables to complete the meal, just like they do at the restaurant. This recipe delivers the same satisfaction as your favorite Applebee's dish, with the added benefit of being made from scratch in your own kitchen.
Let's get started on creating this restaurant-quality lemon chicken at home.
Ingredients for applebee's lemon chicken
Bright citrus, tender chicken, and restaurant-worthy crispiness—just these 13 ingredients transform weeknight dinners.
| Ingredient | Amount | Notes |
|---|---|---|
| Boneless, Skinless Chicken Thighs 🍗 | 1 ½ lb | Evenly sized for consistent cooking |
| Fresh Lemon Juice 🍋 | ½ cup | From 2-3 large lemons |
| Unsalted Butter 🧈 | ½ cup | Cold, cubed for marinade |
| Minced Garlic Cloves 🧄 | 6 cloves | Freshly minced for brightness |
| Ground Black Pepper 🌶️ | 1 tbsp | Freshly cracked for depth |
| Diamond Crystal Kosher Salt 🧂 | 1 ½ tsp | For seasoning and marinade |
| Ground Ginger 🌿 | ½ tsp | Freshly ground preferred |
| Olive Oil 🫒 | 2 tbsp | For crispy crust development |
| All-Purpose Flour 🌾 | ¼ cup | For dredging chicken |
| Cornstarch 🌾 | 2 tbsp | For extra crispiness |
| Fresh Lemon Zest 🍋 | 1 tbsp | From same lemons as juice |
| Fresh Parsley 🌿 | ¼ cup | Chopped for garnish |
| White Wine Vinegar 💧 | 1 tbsp | For sauce acidity |
The chicken thighs are non-negotiable here—boneless, skinless, and evenly sized (about 6-8 oz each) for consistent cooking. Costco's family pack works perfectly, but any grocery store's fresh cut will do. Look for thighs with good marbling but not too much fat. I always trim any excess fat before marinating—it's worth the extra minute. The lemon juice should be freshly squeezed (none of that bottled stuff) to get that signature tang. If you're using organic lemons, the zest will be even more vibrant. For the butter, Land O'Lakes unsalted is my go-to—it's consistently high quality and melts beautifully into the marinade.
No fresh ginger? Ground ginger works at double the amount, but you'll lose some of that fresh zing. The olive oil is crucial for that crispy crust—California extra-virgin has the right balance of fruity notes without overpowering. Running short on flour? Cornstarch alone works (just increase to 1/3 cup) for that signature crispiness. The white wine vinegar can be swapped for apple cider vinegar in a pinch, though it'll have a slightly different flavor profile. For the garlic, peeling and mincing it fresh makes all the difference—those pre-minced jars just don't cut it. And if you're feeling fancy, toast the minced garlic in the butter for 30 seconds before mixing into the marinade—game changer.
Marinate the chicken for at least 30 minutes (up to 4 hours for maximum flavor), covered in the fridge. The marinade keeps for 3 days in an airtight container, though I usually use it up faster. For the sauce, make it fresh—it's that bright lemon-butter combo that makes this dish shine. The cornstarch slurry (mix 1 tbsp cornstarch with 1 tbsp cold water) thickens the sauce perfectly. Store leftovers in the fridge for 3 days or freeze for 2 months. I always make extra sauce—it's perfect over rice or as a drizzle for vegetables.
Why You'll Love This Recipe
- 20-Minute Magic: The chicken thighs brown in one pan while the butter and garlic sizzle—no flipping, no fuss. Honestly, the only prep is slicing the lemon and mincing garlic, and even that’s just a few cloves.
- Zesty Tang You’ll Crave: That bright lemon juice cutting through the rich butter? It’s the perfect balance—juicy, garlicky, with just enough pepper to wake up every bite. (Yes, even on a Tuesday night.)
- Lunchbox Hero: Pack the leftovers cold or reheated—they’re solid for work lunches or school lunches. My kid still asks for it, even after I’ve made it a dozen times.
- Budget-Friendly Feast: Chicken thighs stretch further than breasts, and the butter-garlic-lemon combo feels fancy without breaking the bank. I’ll be real: this is my go-to when I want restaurant-quality without the price tag.
Step-by-step instructions for Applebee's lemon chicken
Here's how to recreate that signature bright citrus crust and juicy interior at home.
Marinate the Chicken for Maximum Flavor
In a large bowl, combine the 0.5 cup fresh lemon juice, 0.5 cup unsalted butter, 1.5 tsp diamond crystal kosher salt, 0.5 tsp ground ginger, and 1 tbsp ground black pepper. Whisk until the butter melts completely and the marinade becomes smooth and emulsified.
Add the 1.5 lb boneless, skinless chicken thighs to the bowl and turn to coat evenly. Cover and refrigerate for at least 4 hours or overnight. This long marinating time ensures the chicken stays juicy and absorbs all that bright citrus flavor. The acidity from the lemon juice helps tenderize the meat while the butter creates a rich, flavorful crust.
Create the Crispy Lemon Coating
In a separate bowl, whisk together the 0.25 cup all-purpose flour, 2 tbsp cornstarch, and 1 tbsp fresh lemon zest. The cornstarch is key here—it creates an extra-crispy coating that mimics the restaurant version perfectly. Add the 6 cloves minced garlic cloves to this mixture and stir well.
Remove the chicken from the marinade (reserve the marinade for later) and pat dry with paper towels. This step is crucial—any moisture will prevent the coating from adhering properly. Working in batches if needed, dredge each chicken thigh in the flour mixture, pressing gently to ensure an even coating. Let them rest on a wire rack for 10 minutes while you prepare the cooking setup.
Cook Until Golden and Juicy
Heat 2 tbsp olive oil in a large skillet over medium heat. Add the coated chicken thighs and cook for 4-5 minutes per side until they develop a deep golden brown crust. The cornstarch coating will crisp up beautifully, creating that signature Applebee's texture. Don't overcrowd the pan—cook in batches if needed to maintain even heat.
Once golden brown, transfer the chicken to a plate and tent loosely with foil. Keep it warm while you prepare the sauce. The chicken should reach an internal temperature of 165°F—use a meat thermometer to check the thickest part. If it's not quite there, return it to the skillet for another minute or two.
Make the Lemon Garlic Sauce
In the same skillet (no need to clean it—the browned bits add flavor), melt the reserved marinade over medium-low heat. Add the 1 tbsp white wine vinegar and bring to a gentle simmer. Let it reduce by half, about 3-4 minutes, until it thickens slightly and coats the back of a spoon.
Stir in the 0.25 cup fresh parsley and remove from heat. The sauce should be bright, tangy, and just thick enough to coat the chicken. If it's too thin, let it simmer uncovered for another minute to reduce further. Taste and adjust seasoning with additional salt or pepper if needed.
Serve with Perfectly Balanced Flavors
Pour the lemon garlic sauce over the chicken and let it sit for 1-2 minutes to absorb. The residual heat will help the sauce cling to the chicken, creating that signature restaurant-style finish. Garnish with additional lemon zest if desired.
Serve immediately with rice or your favorite sides. Each bite should deliver perfectly balanced flavors—juicy, tender chicken with a crispy citrus crust and a bright, tangy sauce. The combination of lemon, garlic, and ginger creates a complex flavor profile that's both refreshing and satisfying.
Pro Tips For Making Applebee'S Lemon Chicken
- SEAR THE THIGHS FIRST: I learned this the hard way—skipping the initial sear makes the sauce cling like wallpaper instead of a glossy finish. Hit medium-high heat with 1-2 tbsp butter (yes, even if the recipe says "melt"), let those thighs develop a light crust for 3-4 minutes per side before pulling them out. The butter’s color will deepen from gold to nutty brown—that’s your cue.
- ZEST THE LEMON: Fresh lemon juice is non-negotiable, but the zest is the silent star here. After juicing, rub the dried peel over the chicken while it rests—it adds a bright, aromatic layer that cuts through the richness of the butter. (Pro move: Use a microplane and scrape just the yellow part; no bitter white pith.)
- DON’T OVERCOOK THE GARLIC: Minced garlic burns faster than you’d think, especially when tossed with butter. Sauté it for exactly 30 seconds—just until fragrant—before adding the lemon juice. Overcooking turns it bitter, and nothing ruins the balance of this dish faster than sad, dark garlic.
- DEGLAZE WITH JUICE + WATER: The sauce clings better if you don’t rush the deglazing. After removing the chicken, pour in the lemon juice first, let it bubble for 20 seconds, then add 2 tbsp water. The residual heat emulsifies the butter into the pan juices, creating a velvety sauce instead of a thin glaze. (Yes, even if the recipe doesn’t say to add water—trust me.)
Dietary considerations for applebee's lemon chicken
Gluten-Free Adaptation
To make this recipe gluten-free, replace the all-purpose flour and cornstarch coating with a 1:1 gluten-free flour blend like Bob's Red Mill or King Arthur. Mix ¼ cup gluten-free flour blend with 2 tbsp cornstarch (or 2 tbsp gluten-free cornstarch) and 1 tbsp lemon zest.
The texture will be slightly different but still crispy. Always check labels to ensure no cross-contamination with gluten grains. 🌾
Dairy-Free Substitutions
For a dairy-free version, swap the ½ cup unsalted butter in the marinade with ½ cup dairy-free butter (like Miyoko's or Earth Balance) or ½ cup olive oil. The flavor remains rich, though slightly less creamy.
For the sauce, use dairy-free butter or coconut oil instead of the reserved marinade butter. The citrus notes will still shine through beautifully.
Lower-Carb Options
Cut carbs by omitting the rice and serving the chicken over cauliflower rice or a zucchini noodle salad. The lemon chicken itself is already low-carb, with only 4g net carbs per serving (without rice).
For extra flavor, drizzle with sugar-free lemon aioli or a sprinkle of crushed pork rinds for a crispy, crunchy topping that mimics the original coating.
Allergen-Friendly Adjustments
For nut allergies, ensure all ingredients are nut-free (some brands of butter or flour blends may contain traces). For egg allergies, no adjustments are needed—this recipe is naturally egg-free. Always double-check ingredient labels, especially for pre-made flour blends or butter substitutes, as cross-contamination can occur during processing.
Spicy Variations
Add heat by mixing ½ tsp cayenne pepper or 1 tsp hot sauce (like Cholula) into the marinade. For a smoky kick, add ½ tsp smoked paprika to the flour coating.
Garnish with sliced jalapeños or a sprinkle of red pepper flakes for extra spice. This keeps the dish's signature citrus flavor while adding a bold, spicy twist. 🌶️
Kid-Friendly Tweaks
Mild the lemon flavor for kids by reducing the lemon juice to ¼ cup and adding 1 tsp honey (or maple syrup) to the marinade. Skip the lemon zest or use orange zest instead for a sweeter profile.
Serve with buttered noodles or steamed carrot sticks to make it more appealing. The sauce can also be thinned with a splash of chicken broth for a milder taste.
Nutrition facts
Frequently asked questions
Can I use chicken breasts instead of thighs?
Chicken thighs are ideal for this recipe—they stay juicy and tender while developing that signature crispy crust. If you prefer breasts, use 1 lb boneless, skinless breasts (about 4 pieces) and reduce marinating time to 2-3 hours max. Cook them for 3-4 minutes per side at medium heat to avoid drying out.
How do I make the sauce extra creamy?
For a richer sauce, whisk in 1 tbsp cold butter at the end or add 1 tbsp heavy cream while reducing. For a restaurant-style finish, melt 1 tbsp butter in the skillet before adding the reserved marinade—this creates a glossy, velvety texture that clings beautifully to the chicken.
What if my chicken isn't crispy?
Crispiness comes from proper drying and high heat. Pat the chicken very dry before dredging, and cook in batches over medium-high heat until golden brown. If using an oven, broil for 2-3 minutes at the end. The cornstarch coating needs direct heat to crisp—don't overcrowd the pan!
Can I make this in an air fryer?
Preheat the air fryer to 375°F and cook the dredged chicken for 12-15 minutes, flipping halfway. Spray with olive oil mist before air frying for extra crispiness. The sauce preparation remains the same—just pour it over the chicken after cooking.
How long can I store leftovers?
Store leftovers in an airtight container in the fridge for 3 days or freeze for 2 months. Reheat gently in a skillet over low heat with a splash of water or lemon juice to maintain moisture. Avoid microwaving—the sauce can become watery and lose its bright flavor.