
Main Courses
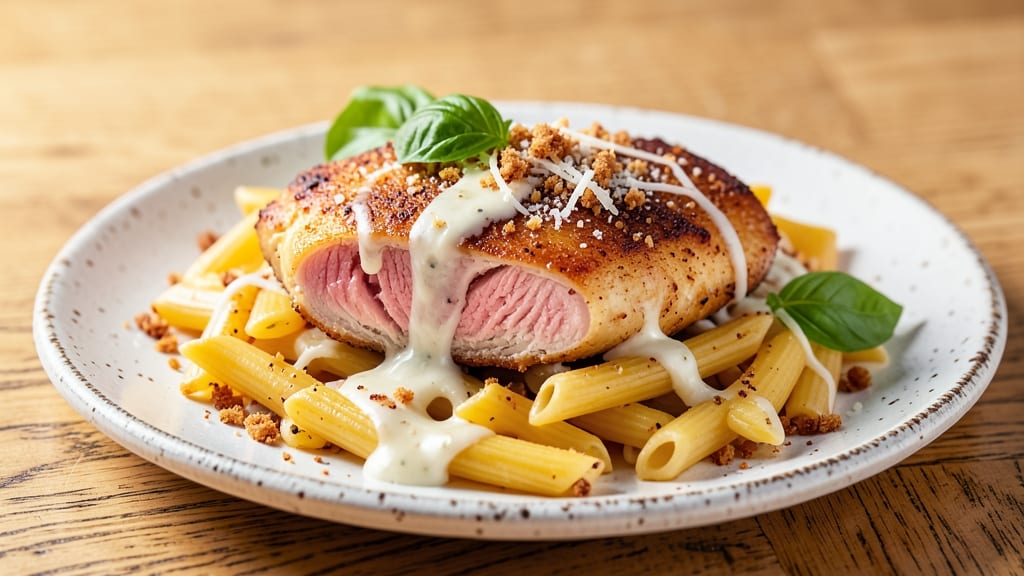
This Applebee's Three Cheese Chicken Penne copycat recipe delivers the same restaurant-quality comfort you crave at home—crispy chicken, creamy tomato sauce, and three cheeses baked to perfection.
The secret lies in breading the chicken twice for maximum crunch, then topping it with a blend of mozzarella, cheddar, and parmesan that melts into a golden, bubbly blanket.
I've recreated this dish exactly as it comes from the restaurant, right down to the crispy parmesan crunch that makes every bite irresistible.
The foundation of this recipe is a rich tomato sauce simmered with garlic and herbs, which coats the penne pasta perfectly. The chicken is seasoned, breaded, and baked until golden and crispy, ensuring that first satisfying crunch with every forkful.
What sets this copycat version apart is the three-cheese topping—mozzarella for creaminess, cheddar for sharpness, and parmesan for that signature crispy finish. It’s the kind of dish that feels indulgent yet comes together with straightforward techniques.
By the time you serve this dish, you’ll have a restaurant-worthy plate of penne smothered in creamy tomato sauce, topped with perfectly crispy chicken, and blanketed in melted cheese. The aroma alone will have everyone gathering around the table, and the first bite delivers on that comforting, cheesy, crispy experience.
This is the recipe that finally makes Applebee’s Three Cheese Chicken Penne feel like a homemade favorite.
Serve with a side of garlic bread or a simple Caesar salad to complete the meal. The leftovers reheat beautifully, making this a perfect dish for meal prep or feeding a crowd. Here’s how to recreate it step by step—just like the restaurant, but better.
Ingredients for applebee's three cheese chicken penne copycat
Crispy chicken, creamy tomato sauce, and three cheeses—these are the stars of your copycat Applebee's dinner.
| Ingredient | Amount | Notes |
|---|---|---|
| Boneless, Skinless Chicken Breasts 🍗 | 1 ½ lb | Pounded to even thickness |
| Penne Pasta 🍝 | 12 oz | Dry, medium length |
| All-Purpose Flour 🌾 | 1 cup | For breading chicken |
| Italian Seasoned Breadcrumbs 🍞 | 1 cup | Panko works too |
| Grated Parmesan Cheese 🧀 | ½ cup | Freshly grated preferred |
| Shredded Mozzarella Cheese 🧀 | 1 cup | Part-skim or whole milk |
| Shredded Sharp Cheddar Cheese 🧀 | ½ cup | For extra sharpness |
| Canned Tomato Sauce 🍅 | 2 cups | 24 oz can, no sugar added |
| Garlic Cloves 🧄 | 4 cloves | Minced for sauce |
| Large Eggs 🥚 | 2 whole | Beaten for egg wash |
| Olive Oil 🫒 | ½ cup | For frying chicken |
| Dried Oregano 🌿 | 1 tsp | Italian blend preferred |
| Dried Basil 🌿 | 1 tsp | Or 1 tbsp fresh |
| Salt 🧂 | 1 ½ tsp | Kosher or sea salt |
| Ground Black Pepper 🌶️ | ½ tsp | Freshly ground preferred |
The chicken is everything here. Boneless, skinless breasts work best—pound them to even thickness so they cook uniformly. Costco or Kroger usually have them pre-cut, but if you're buying whole, look for plump, firm pieces with minimal fat. The breading secret? Two layers—flour, egg wash, then breadcrumbs—gives that signature restaurant crunch. I always grab Italian seasoned breadcrumbs from the baking aisle, but plain panko works in a pinch if that's what you've got.
No Italian seasoned breadcrumbs? Plain panko plus dried oregano and basil gets you close. The tomato sauce can be jarred (I use Rao's or Barilla for that authentic vibe), but homemade is worth it—just tomato sauce, garlic, herbs, and a pinch of salt. Fresh mozzarella is ideal for the topping, but pre-shredded part-skim from the store works fine. The cheddar adds that sharp kick—sharp white cheddar is best, but whatever you've got will do. For the Parmesan, freshly grated from a block makes all the difference—pre-grated gets clumpy and lacks that crispy finish.
This dish reheats beautifully—honestly tastes better the next day once everything melts together. Store leftovers in an airtight container for up to 3 days. For meal prep, portion the pasta and sauce separately, then assemble when ready to eat. The breaded chicken stays crispy for about 2 days if kept in the fridge—just reheat in the oven at 375°F for 10 minutes to restore that crunch. Freeze the unbaked casserole for up to 2 months—it's perfect for lazy weeknights.
Why You'll Love This Recipe
- No-Fuss Breading: I swear by the flour-dredge-breadcrumb method here—no fancy steps, just a quick shake and dip. That crispy coat on the chicken? It’s all in the Italian seasoned breadcrumbs, and trust me, they stick like magic.
- Cheesy Comfort in Every Bite: The moment the three-cheese sauce (Parmesan + mozzarella + cream cheese) hits your tongue—yes, it’s that good. Rich but not heavy, with that perfect pull of al dente penne to cut through it.
- Lunchbox Hero: Between us, this is my go-to for meal prep. The leftovers reheat beautifully, and my kids actually ask for it in their lunches. (Yes, even on a Tuesday.)
- Budget-Friendly Feast: A single chicken breast and a box of penne stretch to feed four—no fancy ingredients, just smart pantry staples. Honestly, it’s the kind of dish that makes me feel like I’m treating everyone without breaking the bank.
Step-by-step instructions for Applebee's three cheese chicken penne copycat recipe
Here's how to nail that signature crispy chicken and creamy cheese sauce at home.
Prepare the Chicken for Crispy Perfection
Start by pounding the 1.5 lb boneless, skinless chicken breasts between two sheets of plastic wrap to an even ½-inch thickness. This ensures they cook evenly and stay juicy. Season both sides generously with 1.5 tsp salt and 0.5 tsp ground black pepper. The seasoning should cling to the meat, not just sit on top.
Set up three shallow dishes: one with the 1 cup all-purpose flour, one with the 2 whole large eggs beaten until smooth, and one with the 1 cup Italian seasoned breadcrumbs. Dredge each piece of chicken first in the flour, shaking off any excess, then dip into the egg wash, letting any drips fall back into the bowl. Finally, press the chicken into the breadcrumbs, coating it evenly. This triple breading creates that signature crispy texture. Let the breaded chicken rest for 5 minutes before frying - this helps the coating adhere better.
Fry the Chicken Until Golden and Crispy
Heat 0.5 cup olive oil in a large skillet over medium heat until it shimmers but doesn't smoke. Add the breaded chicken in a single layer, being careful not to overcrowd the pan. Cook for 4-5 minutes per side until the chicken is golden brown and the internal temperature reaches 165°F. You'll know it's ready when the breading is crispy and the chicken releases easily from the pan.
Transfer the fried chicken to a paper towel-lined plate to drain any excess oil. The chicken should stay warm while you prepare the pasta, but don't let it sit too long or it'll lose its crispiness. Keep it at 170°F or above in a 200°F oven if needed while you finish the dish.
Cook the Penne and Prepare the Creamy Tomato Sauce
Bring a large pot of salted water to a boil and cook the 12 oz penne pasta until al dente - about 2 minutes less than the package instructions. Reserve 1 cup of pasta water before draining, as we'll use it to adjust the sauce consistency later. While the pasta cooks, heat the 2 cups canned tomato sauce in a large skillet over medium heat. Add the 4 cloves minced garlic, 1 tsp dried oregano, and 1 tsp dried basil, stirring constantly for 2-3 minutes until fragrant.
Reduce the heat to low and stir in the 0.5 cup grated Parmesan cheese, 1 cup shredded mozzarella cheese, and 0.5 cup shredded sharp cheddar cheese. Let the mixture melt together for 3-4 minutes, stirring occasionally. If the sauce starts to thicken too much, add 2-3 tablespoons of reserved pasta water to reach your desired consistency. The sauce should be creamy but still coat the back of a spoon.
Assemble and Finish the Dish
Add the cooked penne pasta to the skillet with the cheese sauce and toss to coat evenly. If needed, add more reserved pasta water 1 tablespoon at a time until the sauce clings nicely to the pasta. Stir in the fried chicken and heat through for 1-2 minutes, just enough to warm everything together without making the chicken soggy. The cheese should be melted and bubbly, creating that signature creamy texture.
Taste and adjust seasoning if needed - you might need a pinch more salt or pepper to balance the flavors. Divide the dish among four plates, making sure each serving has an equal portion of pasta, chicken, and sauce. The chicken should be crispy, the pasta al dente, and the sauce rich and creamy with melted cheeses throughout.
Pro Tips For Making Applebee'S Three Cheese Chicken Penne Copycat
- CRUST THE CHICKEN TWICE: The first coat of flour is just the start—dip the chicken in beaten egg first, then in flour, then breadcrumbs. That middle step keeps the crumb from falling off when you toss it in the skillet. (Yes, I learned this after my first batch turned into a sad, greasy mess.)
- USE COLD CHICKEN BREASTS: Pat the chicken dry and let it sit in the fridge for 20 minutes before breading. Cold meat sears better and stays juicier, so it won’t turn out rubbery when you’re trying to get that golden crust. (I used to skip this and wondered why my chicken always tasted dry.)
- DON’T OVERMIX THE SAUCE: Stir the cheese into the pasta sauce just until melted—no need to blend it into oblivion. Lumps of cheese mean better texture, and overworking it turns the sauce gluey. (I used to puree it like soup, and it lost all that creamy, cheesy goodness.)
- TOAST THE BREADCRUMBS: Spread the Italian-seasoned breadcrumbs on a baking sheet and toast them in a 375°F oven for 5 minutes before using. It deepens their flavor and prevents them from absorbing all the oil in the pan, so your crust stays crispy. (Sounds weird, but it works—trust me.)
Pro cooking tips for great applebee's three cheese chicken penne copycat
Double-Breading Secret
This is the game-changer for that signature restaurant crunch. After dredging your chicken in flour and egg wash, press it firmly into the breadcrumbs—don’t just sprinkle! I use my fingers to really pack the crumbs into every crevice, then let the chicken rest for 5 minutes before frying.
This resting time lets the coating set, so it stays crispy instead of falling apart. For extra insurance, I like to dip the breaded chicken in egg wash a second time before the final breadcrumb coat—this creates that extra-crispy layer you get at Applebee’s. 🍗
Oil Temperature Control
Medium heat is key here—too hot and your breading burns before the chicken cooks through. Test the oil by dropping in a pinch of breadcrumbs: if they sizzle and turn golden in 30 seconds, your oil is ready.
I use a deep skillet (like my All-Clad 10-inch) to keep the oil hot and even. Cook the chicken in batches if needed—overcrowding steams the breading instead of crisping it. A meat thermometer is your best friend to check for 165°F internal temperature without cutting into the chicken. 🌡️
Cheese Sauce Consistency
The sauce should coat the back of a spoon but still be pourable—this is where that reserved pasta water comes in. Start with 2 tablespoons and add more 1 teaspoon at a time until you reach the perfect consistency.
I like to melt the cheeses over low heat for 3-4 minutes, stirring constantly to prevent scorching. The mozzarella should melt smoothly, while the cheddar adds that sharp, tangy kick. Pro tip: If your sauce separates, whisk in 1 tablespoon of cold water to emulsify it back together.
Keeping Chicken Crispy
Here’s my foolproof method: after frying, transfer the chicken to a wire rack set over a baking sheet. Pop it in a 200°F oven for 5 minutes while you finish the pasta. This keeps it warm and crispy without making it soggy.
If you’re prepping ahead, assemble the dish (without baking) and refrigerate. When ready to serve, bake at 375°F for 10-15 minutes until the cheese is bubbly and the chicken is heated through. The oven’s dry heat is the secret to maintaining that restaurant-quality crunch. 💡
Garlic Timing Matters
Add the 4 cloves minced garlic to the tomato sauce only when it’s simmering gently—never let it burn! Cook it for exactly 2-3 minutes until fragrant but not browned. Burnt garlic makes the whole dish taste bitter.
I like to use a microplane to zest the garlic cloves before mincing, which releases more flavor. If you’re short on time, 1 teaspoon garlic powder works in a pinch, but fresh is always better. 🧄
Pasta Water Reserve
Never skip reserving that 1 cup pasta water—it’s the glue that holds your sauce together. The starch in the water helps the cheese melt smoothly and coats the pasta evenly.
If your sauce gets too thick while melting the cheeses, add the pasta water 1 tablespoon at a time, stirring constantly. I’ve ruined more than one batch by ignoring this step—trust me, the sauce will taste flat without it.
For extra richness, save an extra ½ cup** and stir it into the final dish before serving. 🍝
Nutrition facts
Frequently asked questions
Can I use chicken thighs instead of breasts for this recipe?
Chicken thighs work beautifully and stay juicier than breasts. Use 1.5 lb boneless, skinless thighs instead, and adjust cooking time to 5-6 minutes per side until golden and reaching 165°F internally. The skin-on version adds extra flavor, but remove it before breading if preferred.
How do I keep the chicken from getting soggy when adding it to the pasta?
Transfer fried chicken to a wire rack set over a baking sheet and warm in a 200°F oven for 5 minutes while finishing the pasta. This maintains crispiness. For extra insurance, add chicken to the pasta just before serving and heat through for only 1-2 minutes—never let it sit in the sauce.
Can I make this dish ahead of time?
Yes! Assemble everything (except baking) up to 2 days ahead and refrigerate. When ready to serve, bake at 375°F for 10-15 minutes until bubbly. For freezing, assemble unbaked and freeze for up to 2 months. Thaw overnight in the fridge before baking. The flavors actually improve after resting!
What's the best way to reheat leftovers?
Reheat in a 350°F oven for 10-12 minutes covered with foil to prevent drying. For microwave reheating, cover with a damp paper towel and heat in 30-second intervals, stirring between each. The chicken stays crispy when reheated properly—just avoid steaming it.
Can I substitute any of the cheeses?
Certainly! For the topping, use 1.5 cups total cheese with any combination. Try pepper jack for heat, fontina for creaminess, or gouda for caramelized flavor. The sauce cheese can use cream cheese (¼ cup) for extra richness, but keep the total sauce volume the same.