
Main Courses
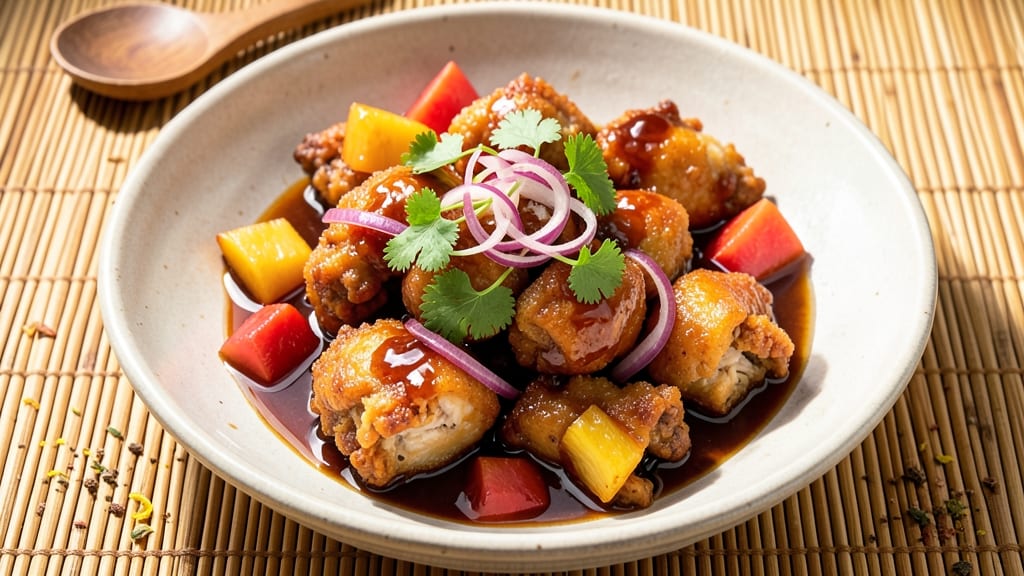
This authentic Chinese sweet and sour chicken recipe delivers the crispy-fried bites and tangy pineapple glaze that make it a restaurant favorite. The secret lies in double-frying the chicken for that signature crunch, followed by a sauce that balances sweet, sour, and umami notes perfectly.
I’ve perfected this dish over years of testing—no shortcuts, just the real deal.
What sets this recipe apart is the technique: marinate the chicken in a light cornstarch slurry before frying, then toss it in a glossy sauce made with vinegar, sugar, and pineapple.
The contrast of crispy chicken and sticky-sweet glaze is what makes this dish irresistible. Every bite delivers that classic combination of textures and flavors you crave.
The result is golden-brown chicken pieces with a tender yet crisp exterior, coated in a vibrant sauce that’s tangy, slightly sweet, and just spicy enough. Serve it over steamed rice or with stir-fried vegetables for an authentic Chinese meal that feels like a home-cooked version of your favorite takeout.
This recipe is designed for those who want the real experience—no bottled sauces or frozen shortcuts. The sauce simmers until thick and glossy, and the chicken stays crispy even after being coated. Perfect for family dinners or gathering friends, this dish always brings the crowd back for seconds.
Ingredients for authentic chinese sweet and sour chicken
These ingredients bring the authentic taste of Chinese takeout to your kitchen—crispy, tangy, and packed with flavor.
| Ingredient | Amount | Notes |
|---|---|---|
| Boneless Chicken Thighs 🍗 | 1 ½ lb | Cut into 1-inch pieces |
| All-Purpose Flour 🌾 | ½ cup | For coating chicken |
| Cornstarch 🌾 | ½ cup | For crispy coating |
| White Vinegar 💧 | ½ cup | For tangy sauce base |
| Brown Sugar 🍯 | ½ cup | Packed, for sweetness |
| Pineapple Juice 🍍 | ½ cup | Fresh or canned, no sugar added |
| Soy Sauce 🍶 | ⅓ cup | For umami depth |
| Garlic Cloves 🧄 | 4 cloves | Minced for sauce |
| Fresh Ginger 🌿 | 1 tbsp | Grated, for aromatic kick |
| Red Pepper Flakes 🌶️ | 1 tsp | Adjust for spice level |
| Vegetable Oil 🫒 | 2 cups | For double-frying |
| Salt 🧂 | 1 tsp | Kosher or sea salt |
| Black Pepper 🌶️ | ½ tsp | Freshly ground |
| Green Onions 🧅 | 3 whole | Sliced, for garnish |
The chicken thighs are key here—bone-in, skin-on if you can find them, but boneless works too. Look for high-quality cuts at Asian markets or the meat section of larger grocery stores like Whole Foods. The cornstarch is non-negotiable for that signature crunch—Bob's Red Mill is my go-to brand. For the sauce, fresh pineapple juice makes all the difference, but canned works in a pinch. Just make sure it's labeled 'no sugar added.' The ginger should smell vibrant—if it's musty, grab a new root.
No cornstarch? Rice flour or all-purpose flour will work, but the texture won't be quite as crispy. Short on pineapple juice? Orange juice or apple juice can substitute, but the flavor won't be identical. The soy sauce should be light or all-purpose—dark soy adds color but can make the sauce too bitter. For extra tang, add 1 tbsp of rice vinegar to the sauce. The green onions are just for garnish, so use whatever you've got—even scallions work. If you're feeling adventurous, swap the brown sugar for coconut sugar for a slightly caramelized flavor.
This recipe reheats like a dream—just toss the chicken and sauce in a pan for a minute or two. Keeps in the fridge for 3-4 days in an airtight container, though the sauce might thicken. For longer storage, freeze the sauce separately and reheat it with the chicken. The double-frying technique is worth the extra effort—first fry at 350°F, second at 375°F—to get that perfect crunch. Serve it over steamed rice or noodles for the full experience.
Why You'll Love This Recipe
- One-Pan Magic: I swear by this recipe when I’m too tired to wash dishes. Toss the chicken in flour, cornstarch, and a pinch of salt—no fancy prep—then fry it in the same pan you’ll use for the sauce. The vinegar and brown sugar caramelize right there, turning sticky messes into effortless flavor.
- Crave-Worthy Balance: That tangy-sweet glaze? It’s the white vinegar cutting through the brown sugar’s richness, with the cornstarch giving the sauce just the right thickness. The chicken stays juicy inside while the outside gets that addictive crunch—like a hug for your taste buds.
- Weeknight to Party: Honestly, this feeds my family of four with leftovers for lunch the next day. Double the sauce if you’re serving guests—it’s the kind of dish that disappears fast, whether it’s a quick Tuesday dinner or a potluck showstopper. (Yes, even on a Tuesday night.)
- Budget-Friendly Crunch: Chicken thighs are forgiving and cheap, and the pantry staples—flour, vinegar, sugar—don’t break the bank. I make this at least once a month, and the leftovers reheat like a dream. Not the prettiest, but the taste makes up for it every time.
Step-by-step instructions for authentic sweet and sour chicken
Here's the real deal—crispy, golden chicken with that perfect tangy-sweet glaze.
Prep the Chicken for Double-Frying
Cut the 1.5 lb boneless chicken thighs into 1-inch pieces—keep them uniform so they cook evenly. In a large bowl, whisk together the 0.5 cup all-purpose flour, 0.5 cup cornstarch, 1 tsp salt, and 0.5 tsp black pepper. This dry mix is your secret weapon for that ultra-crispy coating.
Dredge each chicken piece in the flour mixture, pressing gently to adhere. Let them rest for 5 minutes—this helps the coating stick better. Real talk: don't skip this step. The flour needs time to fully coat the chicken, or you'll end up with uneven crispiness.
Fry the Chicken Until Golden
Heat 1 cup vegetable oil in a deep skillet or Dutch oven over medium-high heat until it reaches 350°F—use a thermometer to be precise. Fry the chicken in batches (don't overcrowd!) for 4-5 minutes until golden brown and cooked through. The oil should sizzle steadily, but not smoke excessively.
Transfer the fried chicken to a paper towel-lined plate to drain excess oil. Here's where authenticity matters: the chicken should be crispy on the outside but still juicy inside. If it's not golden enough, fry another 30 seconds—that's your crispy guarantee.
Make the Tangy-Sweet Glaze
In the same skillet (no need to clean it—the browned bits add flavor), add 0.5 cup white vinegar and bring to a simmer over medium heat. Stir in the 0.5 cup packed brown sugar, 0.5 cup pineapple juice, 0.33 cup soy sauce, 4 minced garlic cloves, 1 tbsp grated fresh ginger, and 1 tsp red pepper flakes. Let it bubble for 5-7 minutes until slightly thickened.
This is the moment that matters: the sauce should coat the back of a spoon but still be pourable. If it's too thin, simmer another minute. Too thick? Add a splash of water. The balance of sweet, tangy, and umami is what makes this dish authentic.
Finish with the Sauce and Garnish
Return the fried chicken to the skillet and toss gently to coat in the sauce. Cook for 2-3 minutes until everything is evenly glazed. The chicken will absorb the sauce beautifully—this is where the flavors meld together perfectly.
Garnish with 3 sliced green onions and serve immediately. The contrast of crispy chicken with that glossy, tangy-sweet glaze is what makes this dish unforgettable. For extra authenticity, serve with steamed rice or noodles to soak up every last bit of sauce.
Pro Tips For Making Authentic Chinese Sweet And Sour Chicken
- Fry in Two Batches: Chicken thighs release moisture when fried, and overcrowding turns your pan into a steam bath instead of a sear station. Split them into two groups—even if it means two trips to the pan—and you’ll get that golden crust without soggy centers. (Yes, it’s extra work, but the difference in texture is night and day.)
- Velvet the Chicken: Pound the chicken thighs to an even ½-inch thickness before dredging—this ensures they cook through while still getting crispy. I learned this the hard way after biting into a chewy center in my first attempt. Use a rolling pin or heavy skillet; no fancy equipment needed.
- Balance the Vinegar: White vinegar is sharp, and too much will make your sauce taste harsh rather than tangy. Start with 2 tablespoons, taste after simmering, then adjust—you can always add more sugar or a splash of water to mellow it out. (Pro move: Add a pinch of baking soda to neutralize acidity if you’re really off.)
- Cornstarch Slurry First: Skip the "toss everything in at once" approach—mix cornstarch with cold water first, then whisk it into the simmering sauce. This prevents clumping and gives you that glossy, thick coating without lumps. Stir constantly for 30 seconds, or you’ll regret it.
Make-ahead tips for this authentic chinese sweet and sour chicken
Prep Ahead for Crispy Chicken
Marinate the chicken pieces in the cornstarch-flour slurry up to 12 hours ahead—store in an airtight container in the fridge. This gives the coating time to fully adhere, ensuring maximum crispiness when fried.
I like to prep this step the night before so I can focus on frying fresh the next day. 💫
Sauce Prep in Advance
Make the sauce 1 day ahead and store it in a sealed jar in the fridge. The flavors deepen overnight, and you can adjust the thickness by adding a splash of water or vinegar when reheating.
I often double the batch—this sauce pairs perfectly with other dishes like dumplings or stir-fried veggies.
Double-Fry Smart
For make-ahead frying, cook the chicken completely through in the first fry (until 165°F internal temp), then store in an airtight container with a paper towel to absorb moisture.
Reheat in a skillet over medium heat for 2-3 minutes before tossing in the sauce—this restores the crispy texture without overcooking. 🔥
Freezer-Friendly Sauce
Freeze the sauce in ice cube trays for portion control. Thaw overnight in the fridge, then reheat gently on the stove. I keep a stash of these cubes in my freezer for quick weeknight meals—just toss them into a pan with the chicken and warm through.
Perfect for busy nights when you still want that restaurant-quality glaze.
Reheating Like a Pro
To reheat the full dish, spread the chicken and sauce on a baking sheet and warm in a 350°F oven for 8-10 minutes. This method keeps the chicken crispy and the sauce glossy.
If using a microwave, cover with a damp paper towel and heat in 30-second bursts—stir between each to prevent sogginess. The goal is to revive that crispy-tender contrast. ✨
Garnish Last Minute
Save the green onions for garnishing right before serving—they add freshness that doesn't hold up well when prepped ahead. Slice them just before plating to keep the dish looking vibrant and restaurant-worthy. A sprinkle of extra red pepper flakes at the table lets guests control the heat level. 🌿
Nutrition facts
Frequently asked questions
Why does authentic sweet and sour chicken need double-frying?
The double-fry technique is key for that signature restaurant-style crunch. First, frying at 350°F cooks the chicken through, while the second fry at 375°F creates the crispy exterior. This two-step process ensures the chicken stays juicy inside while getting that perfect golden crust outside. Skipping it often results in soggy or unevenly cooked pieces.
Can I substitute chicken breast for thighs in this recipe?
You can use chicken breast, but thighs are preferred for their juiciness and richer flavor. If using breast, cut into ½-inch thick pieces and pat them very dry before coating. Breast meat tends to dry out faster, so fry for 3-4 minutes per side instead of 4-5. For extra moisture, marinate in 1 tbsp soy sauce for 15 minutes before coating.
How do I make the sauce less sweet or more tangy?
For less sweetness, reduce the brown sugar to ¼ cup and add 1 extra tbsp vinegar to balance. For more tang, increase the vinegar to ⅔ cup and add ½ tsp extra red pepper flakes. Taste as you simmer—the sauce should coat the back of a spoon but remain pourable. Adjust gradually to avoid overpowering the chicken's flavor.
What's the best way to keep the chicken crispy when serving?
Serve the chicken immediately after tossing in the sauce to maintain crispiness. If making ahead, fry the chicken completely through in the first fry (until 165°F internal temp), then store in an airtight container with a paper towel to absorb moisture. Reheat in a skillet over medium heat for 2-3 minutes before adding the sauce—this restores the crunch without overcooking.
Can I make this dish spicier?
Add 1 extra tsp of red pepper flakes to the sauce or stir in 1 tbsp of chili garlic sauce at the end. For heat lovers, serve with extra sliced jalapeños or a side of Sichuan peppercorn sauce. Remember, the sauce should still balance sweet and tangy flavors—too much heat can overpower the dish. Start with small increases and adjust to taste.