
Snacks
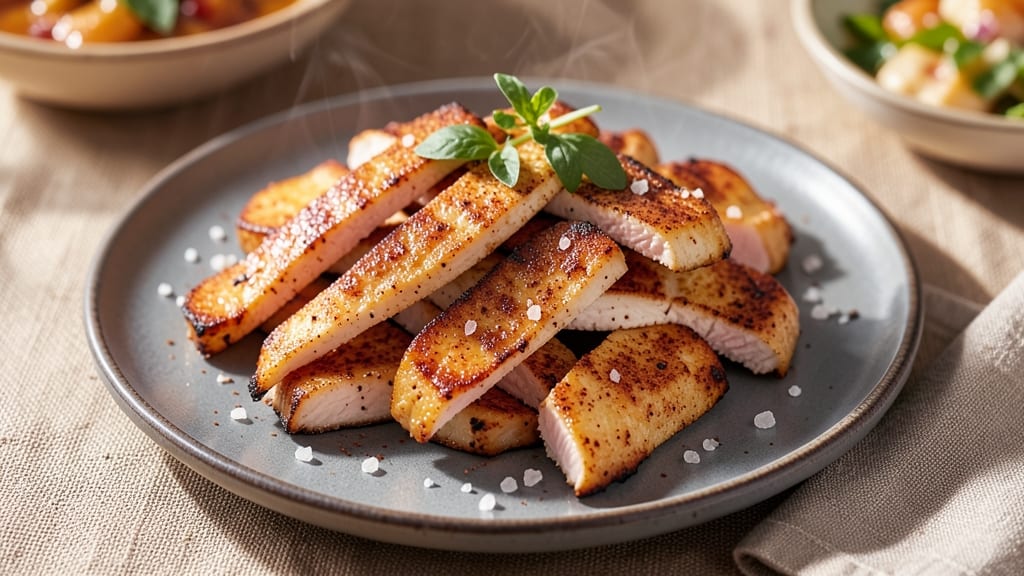
Baked chicken chips deliver that addictive crunch without the grease or deep-fryer hassle—just 20 minutes of oven time transforms simple chicken into crispy, golden bites that disappear faster than you can say "second round." The secret lies in the right breading technique and oven temperature, which I've perfected after testing countless variations. This isn't just a snack; it's a game-changer for anyone craving that satisfying crunch with a fraction of the guilt.
What makes these chicken chips truly special is their texture—crispy on the outside with tender, juicy chicken inside, all achieved with minimal ingredients and no special equipment. The breading stays crisp even after dipping, thanks to a cornstarch boost that creates that signature shatteringly crisp exterior.
I've designed this recipe to be foolproof, whether you're feeding a crowd or just satisfying your own snack cravings.
By the time they emerge from the oven, these golden chips will have you reaching for seconds (or thirds). The flavor profile is customizable—try a simple salt and paprika seasoning for classic appeal, or go bold with Cajun or ranch-inspired coatings.
They're perfect for game day, movie nights, or as a protein-packed snack alternative to traditional chips.
Serve them with your favorite dipping sauces—spicy mayo, ranch, or even a tangy salsa—to turn a simple snack into an interactive experience. The best part? No deep fryer, no greasy cleanup, and no compromise on flavor. Let's get crisping!
Ingredients for baked chicken chips
These crispy, golden chicken chips need just 10 ingredients to transform ordinary chicken into addictive oven-baked perfection.
| Ingredient | Amount | Notes |
|---|---|---|
| Boneless, Skinless Chicken Breast 🍗 | 1 ½ lb | Cut into 1-inch strips for even cooking |
| All-Purpose Flour 🌾 | 1 cup | For light, crispy coating |
| Cornstarch 🌾 | ½ cup | Essential for shatteringly crisp texture |
| Diamond Crystal Kosher Salt 🧂 | 2 tbsp | Fine grain preferred for even distribution |
| Smoked Paprika 🌶️ | 1 tbsp | For subtle smoky depth |
| Ground Black Pepper 🌶️ | ½ tsp | Freshly ground for best flavor |
| Garlic Powder 🧄 | 1 tsp | Adds aromatic complexity |
| Extra-Virgin Olive Oil 🫒 | 2 tbsp | Light coating for crispiness |
| Large Eggs 🥚 | 1 whole | Beaten for even breading adhesion |
| Unsalted Butter 🧈 | 2 tbsp | Melted for crispy finish (optional) |
The chicken matters most here—boneless, skinless breasts cut into even 1-inch strips cook perfectly without drying out. Trader Joe's or Costco often have pre-cut chicken strips, saving time, but cutting them yourself ensures consistency. Look for fresh, plump breasts with minimal fat—Bell & Evans or Perdue are reliable brands. For extra crispiness, pat the strips dry with paper towels before breading (trust me on this). The cornstarch is non-negotiable—it's what creates that signature shatteringly crisp exterior that stays crisp even after dipping.
No cornstarch? Arrowroot powder or potato starch work in a pinch, though texture won't be identical. Short on paprika? Smoked salt at half the amount gives a similar depth. The melted butter finish isn't mandatory but makes a world of difference—European-style unsalted butter like Plugrá melts beautifully. For a ranch-inspired twist, swap the smoked paprika for 1 tsp ranch seasoning plus 1 tsp garlic powder. And if you're feeding a crowd, double the batch—these disappear faster than you can say "second round."
Store unbaked breaded strips in an airtight container in the fridge for up to 12 hours before baking—this gives the coating time to fully adhere. Once baked, keep them in a single layer on a wire rack to maintain crispness for 2-3 days. For freezer-friendly chips, bake first, then store in an airtight container for up to 1 month. Reheat in a 350°F oven for 3-5 minutes to restore crispiness. Pro tip: Serve with warm dipping sauces like spicy mayo or ranch to keep things interactive.
Why You'll Love This Recipe
- No-Fuss Prep: I swear, this takes less time than ordering takeout. Just slice the chicken thin—no fancy cuts needed—and toss it in the flour-cornstarch mix with smoked paprika. Toss, bake, done. That’s it.
- Crispy Without Guilt: The cornstarch gives them that addictive crunch, but the chicken stays juicy inside. Honestly? It’s the kind of crispy that makes you forget they’re “healthy”—until you realize you’re eating leftovers for breakfast.
- Game for Any Meal: Serve them as a snack with ranch, toss them into salads for protein, or pile them on a burger like fries. My kids even ask for them in their lunchboxes—(yes, even on a Tuesday).
- Budget-Friendly Crunch: A single chicken breast stretches into a whole batch, and the pantry staples cost pennies. Between us, this is how I feed a crowd without breaking the bank—or the oven.
Step-by-step instructions for air-crisped chicken chips
Here's how to transform simple chicken breast into addictive, crispy chips without a deep fryer.
Cut and Prep the Chicken
Slice the 1.5 lb boneless, skinless chicken breast into 1-inch strips about ¼-inch thick. I use a sharp chef's knife and cut against the grain for maximum tenderness. Pat each strip completely dry with paper towels—this is non-negotiable for crispiness. Any moisture left behind will steam the coating instead of crisping it.
Arrange the strips on a plate and season lightly with ½ teaspoon of the ground black pepper. This initial seasoning helps the coating adhere better. Let them sit uncovered at room temperature for 10 minutes while you prepare the next components. This small step ensures even cooking and prevents cold spots that could make your chips soggy.
Create the Crispy Coating
In a large bowl, whisk together the 1 cup all-purpose flour, ½ cup cornstarch, 2 tablespoons diamond crystal kosher salt, 1 tablespoon smoked paprika, and 1 teaspoon garlic powder. The cornstarch is what creates that shatteringly crisp texture—don't skip it. Mix well to distribute all the seasonings evenly.
In a separate shallow bowl, beat the 1 whole large egg until just combined. Then, in another small bowl, melt the 2 tablespoons unsalted butter with 2 tablespoons extra-virgin olive oil over low heat until just liquid. This butter-oil mixture will give your chips that extra golden sheen and crispness. Let it cool slightly before using.
Bread the Chicken Strips
Dip each chicken strip into the beaten egg, allowing any excess to drip off. Then, press it firmly into the flour mixture, coating both sides completely. I like to use my fingers to press the coating into the chicken—this ensures maximum adhesion and prevents any gaps that could lead to soggy spots.
After coating, place the strips on a wire rack set over a baking sheet. This keeps them from sticking together and allows air to circulate evenly. Let them rest for 5 minutes while you preheat your oven to 425°F. This resting period helps the coating set slightly, making it easier to handle and ensuring it stays intact during baking.
Bake to Golden Perfection
Transfer the coated chicken strips to a parchment-lined baking sheet, spacing them about 1 inch apart. This gives them room to crisp without steaming. Brush each strip lightly with the melted butter-oil mixture, making sure to coat all sides evenly. Pop the baking sheet into the preheated oven and bake for 12-15 minutes, flipping them once halfway through.
You'll know they're done when the edges are deep golden brown and the coating is shatteringly crisp. The chicken should be cooked through with an internal temperature of 165°F. If you're unsure, slice one open—it should be fully white with no pink, and the coating should crackle when you press it gently with tongs.
Finish and Serve Immediately
As soon as they come out of the oven, transfer the chicken chips to a paper towel-lined plate. They'll continue crisping slightly as they cool, so don't let them sit too long. Sprinkle with an extra pinch of ground black pepper and smoked paprika while they're still hot to enhance the flavors.
Serve immediately with your favorite dipping sauces—think spicy mayo, ranch, or even a tangy aioli. These chips are best enjoyed right away when they're at their crispiest. If you need to reheat them, pop them back in the oven at 375°F for 2-3 minutes to restore that perfect crunch.
Pro Tips For Making Baked Chicken Chips
- USE CORNSTARCH LAST: I learned this the hard way—mixing cornstarch into the flour before dredging makes the coating clump like glue. Instead, sprinkle it lightly over the flour after you’ve coated the chicken once. That’s what gives those chips that perfect crispy snap without turning into a dense, floury mess.
- SALT THE CHICKEN FIRST: This isn’t just about flavor—it’s about texture. Pat the chicken dry, then sprinkle it with half the total salt you’d use on the finished chips. Let it sit for 10 minutes before dredging. The salt draws out moisture, so the coating sticks better and the chips stay crispy longer.
- AVOID OVERLAPPING PIECES: I used to crowd the baking sheet like a sardine can, thinking more would cook faster. Wrong. Give each piece at least an inch of space—otherwise, they steam instead of crisp. If your oven’s too small, bake in batches. Your future self will thank you when you’re not chewing on soggy, uneven chips.
- REST THE CHICKEN AFTER CUTTING: This isn’t just for whole breasts. Slice those chicken breasts into strips, then let them sit uncovered in the fridge for 20-30 minutes. The surface firms up, so the coating adheres like it’s supposed to. I skip this when I’m lazy, but the chips turn out noticeably better when I don’t.
Regional styles of this baked chicken chips
Southern BBQ Style
For a smoky, tangy twist, swap the smoked paprika for 1 tbsp BBQ seasoning blend (I love Badia brand) and add ½ tsp onion powder. Toss the baked chips with 2 tbsp store-bought BBQ sauce (like Sweet Baby Ray's) while still hot.
This Southern-inspired version pairs perfectly with extra ranch or a cool, creamy coleslaw. 🍖
Nashville Hot Twist
Transform these into Nashville-style hot chips by adding 1 tsp cayenne pepper and ½ tsp cayenne seasoning (like Nashville Hot Sauce brand) to the flour mixture. After baking, toss the hot chips with 2 tbsp melted butter and 1 tbsp hot honey for a sweet-spicy kick.
Serve with extra ranch to balance the heat. 🌶️
Cajun Spice Bomb
For a Louisiana-inspired flavor, replace the smoked paprika with 1 tbsp Cajun seasoning (I recommend Tony Chachere's) and add ½ tsp garlic powder and ½ tsp onion powder.
After baking, sprinkle with 1 tsp dried parsley and serve with spicy remoulade or a cool, creamy buttermilk dip. This version brings bold, zesty heat to every bite. 🔥
Italian Parmesan Crunch
Give your chips an Italian flair by mixing ½ cup grated Parmesan cheese into the flour-cornstarch blend. Add ½ tsp dried oregano and ½ tsp dried basil for extra herbaceous flavor.
After baking, sprinkle with 1 tbsp chopped fresh parsley and serve with marinara sauce or a garlic aioli. This version feels fancy but is still easy to make. 🧀
Tex-Mex Fiesta
For a Southwestern-inspired twist, add 1 tbsp chili powder, ½ tsp ground cumin, and ½ tsp dried oregano to the flour mixture. After baking, toss the chips with 2 tbsp lime zest and serve with salsa verde or queso dip.
This version is perfect for game day or taco nights. 🌮
Buffalo Ranch Crunch
Create a buffalo ranch flavor by adding 1 tbsp ranch seasoning (like French's) and ½ tsp garlic powder to the flour blend. After baking, toss the chips with 2 tbsp melted butter and 1 tbsp hot sauce (like Frank's RedHot).
Serve with extra ranch or blue cheese dressing for a crowd-pleasing combo. 🍗
Nutrition facts
Frequently asked questions
Can I use chicken thighs instead of breasts for these chips?
Yes, but with adjustments! Chicken thighs have more fat and cook slower, so trim excess fat and reduce baking time to 10-12 minutes. The skin-on version crisps beautifully but requires 400°F for 15-18 minutes. For even cooking, cut thighs into ½-inch thick strips and pat extra dry.
Why did my chicken chips turn out soggy?
Soggy chips usually mean moisture didn't evaporate properly. Double-check these fixes:
- Pat chicken bone-dry,
- Don't overcrowd the baking sheet (leave 1-inch gaps), and
- Bake at 425°F for 12-15 minutes—any lower temp steams instead of crisps. Pro tip: Rest strips 5 minutes after breading before baking.
How do I make these chips gluten-free?
Replace flour with 1 cup gluten-free all-purpose blend (like Bob's Red Mill) and ½ cup cornstarch. Use 1 egg wash (or flax egg for vegan) and 2 tbsp melted butter/oil for crispiness. For extra adhesion, add 1 tbsp gluten-free oat flour to the mix. Texture won't be identical but still delicious!
Can I bake these in an air fryer instead?
Preheat air fryer to 400°F, arrange chips in a single layer (no overlapping), and cook for 8-10 minutes, shaking halfway. For extra crispiness, spray lightly with oil before air frying. Watch closely—they crisp faster than in the oven.
What's the best way to store leftover chips?
Keep them crispy by storing in an airtight container between layers of parchment paper. For 1-2 days, keep at room temp. For longer storage, freeze baked chips (uncoated) for up to 1 month. Reheat frozen chips at 375°F for 3-5 minutes—they'll be crispy again!