
Main Courses
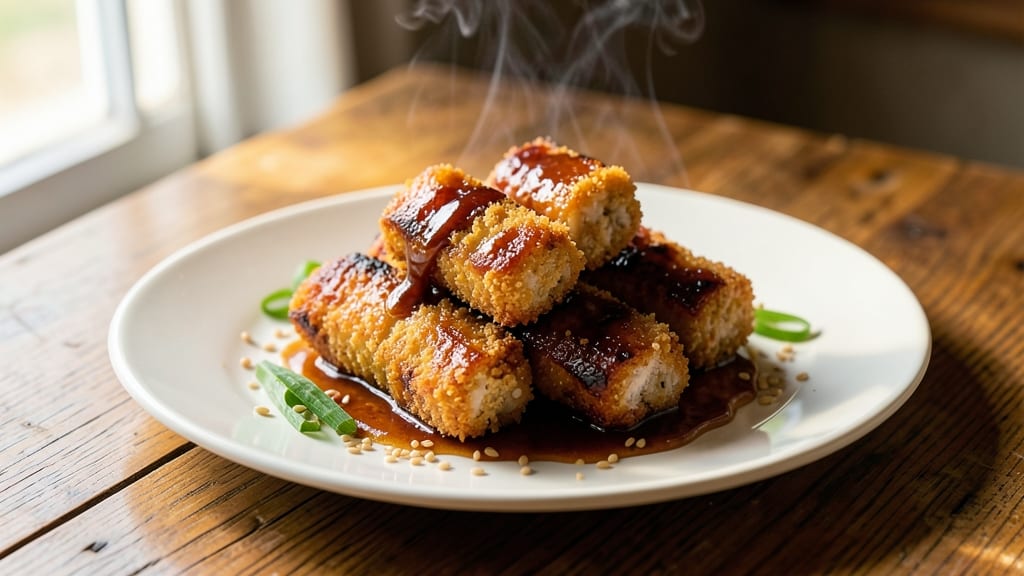
This baked teriyaki chicken tenders recipe delivers crispy golden edges and tender juicy centers in just 30 minutes—no deep-frying required. The secret lies in a simple breading technique paired with a homemade teriyaki glaze that caramelizes beautifully in the oven.
I developed this version after years of perfecting restaurant-style tenders at home, and it never fails to impress. The process starts with boneless chicken tenders coated in a light panko-cornstarch mixture for maximum crispiness, then baked until golden.
While they cook, the teriyaki sauce simmers into a glossy glaze that's brushed on just before serving, locking in moisture and adding that signature sweet-savory flavor. What you'll end up with is a plate of restaurant-quality tenders that are crispy on the outside and impossibly tender inside.
This recipe is perfect for weeknight dinners, game day appetizers, or family meals—it comes together quickly but feels special. The teriyaki glaze adds a beautiful sheen and depth of flavor that transforms simple chicken into something extraordinary.
Serve with a side of steamed rice or fresh vegetables for a complete meal. What makes this version stand out is the balance of texture and flavor—no soggy breading, no dry chicken.
The teriyaki sauce isn't just a dip; it's an integral part of the dish, creating a harmonious blend of sweet, tangy, and umami notes in every bite. Let's get cooking!
Ingredients for baked teriyaki chicken tenders
Pantry staples and fresh ingredients for restaurant-style tenders in 30 minutes.
| Ingredient | Amount | Notes |
|---|---|---|
| Boneless Chicken Tenders 🍗 | 1 ½ lb | Cut into 1-inch strips |
| All-Purpose Flour 🌾 | ½ cup | For light coating |
| Panko Breadcrumbs 🍞 | 1 cup | Japanese-style preferred |
| Cornstarch 🌾 | ¼ cup | For extra crispiness |
| Large Eggs 🥚 | 1 whole | Beaten lightly |
| Sesame Oil 🫒 | 1 tbsp | For flavor depth |
| Teriyaki Sauce 🍶 | ¾ cup | Homemade or quality store-bought |
| Honey 🍯 | 2 tbsp | For glaze sweetness |
| Soy Sauce 🍶 | ½ cup | For umami base |
| Garlic Cloves 🧄 | 3 cloves | Minced for sauce |
| Ginger Root 🌿 | 1 tbsp | Freshly grated |
| Vegetable Oil 🫒 | 2 tbsp | For baking tray |
| Salt 🧂 | ½ tsp | Kosher preferred |
| Black Pepper 🌶️ | ¼ tsp | Freshly ground |
The chicken strips are key—look for boneless tenders with even thickness for consistent cooking. Costco or Whole Foods often carry pre-cut tenders, but if buying whole breasts, slice them yourself for uniform pieces. Panko makes all the difference here; Japanese-style is lighter than regular breadcrumbs. For the teriyaki sauce, Kikkoman soy sauce adds authentic flavor. Fresh ginger and garlic are non-negotiable—they bring that restaurant-quality depth. If you can't find fresh ginger, use one-third the amount of powdered, but trust me on the fresh version.
No panko? Crushed cornflakes or regular breadcrumbs work in a pinch, but texture won't be as crispy. Substituting honey? Maple syrup at equal amounts keeps the glaze. For a quicker sauce, store-bought teriyaki (like Kikkoman) works—just add an extra tablespoon of honey. The cornstarch is crucial for that signature crispiness; don't skip it. If you're making a big batch, double the sauce ingredients—it keeps well for 1 week in the fridge.
Prep ahead by mixing the breading and sauce the night before. Chicken stays fresh 2 days in the fridge if sealed tightly. For extra crispiness, bake on the top rack. The sauce caramelizes beautifully when brushed on just before serving—3 minutes in the oven after baking. Leftovers reheat well in a 350°F oven for 5-7 minutes, but texture won't be as crispy as fresh.
Why You'll Love This Recipe
- One-Bowl Wonder: Honestly, I swear by this recipe because it’s three ingredients max for the coating—flour, cornstarch, and panko—whisked together in a bowl while the chicken soaks in teriyaki. No measuring cups out, no separate dry/wet mixing, just dump-and-go.
- Teriyaki Magic: Between us, that sticky-sweet glaze with a hint of ginger? It clings to the crispy panko crust like it’s been glued on—no soggy bites here. The cornstarch in the coating keeps it extra crunchy, and the egg binds it all together so it doesn’t fall apart when you bite in.
- Lunchbox Hero: I make a double batch every Sunday because these reheat perfectly—crispy edges, tender inside—no one can tell they’re leftovers. Pack them cold in containers with a side of extra teriyaki for dipping, and they’re the star of my kids’ school lunches (yes, even on a Tuesday).
- Budget Crunch Savior: Chicken tenders are pricey, but this recipe stretches them further than takeout—panko and cornstarch are cheap staples, and you can use store-brand teriyaki without sacrificing flavor. Plus, the leftovers freeze like a dream, so I’ve got a backup dinner ready in 10 minutes.
Step-by-step instructions for baked teriyaki chicken tenders
Follow this method for perfectly crispy, juicy tenders with a glossy teriyaki glaze every time.
Prepare the Chicken and Breading Station
Preheat your oven to 400°F and line two baking sheets with parchment paper. Cut the 1.5 lb boneless chicken tenders into 1-inch strips—this size ensures even cooking and maximum crispiness. Pat them completely dry with paper towels, which is crucial for that perfect crunch.
In a shallow bowl, whisk together the 0.5 cup all-purpose flour, 0.25 cup cornstarch, 0.5 tsp salt, and 0.25 tsp black pepper. The cornstarch creates an extra-crispy texture that regular flour alone can't achieve. In another shallow bowl, lightly beat the 1 whole large egg with the 1 tbsp sesame oil—this adds depth of flavor and helps the breading stick.
Bread the Chicken Tenders
Set up an assembly line: dip each chicken strip into the egg mixture first, letting any excess drip off. Then press it firmly into the flour mixture, coating all sides completely. I press gently but firmly—this ensures the breading adheres well and creates that satisfying crunch. Place the breaded tenders on the prepared baking sheets, spacing them about 1 inch apart so they cook evenly and develop crispy edges.
For extra crispiness, I recommend chilling the breaded tenders in the refrigerator for 15-20 minutes before baking. This step might seem counterintuitive, but it helps the breading set and prevents the chicken from steaming in its own juices during baking. Don't skip this if you want that perfect texture.
Bake Until Golden and Crispy
Bake the chicken tenders for 12-15 minutes, flipping them halfway through at the 7-minute mark. You'll know they're ready when the edges are deep golden brown and the internal temperature reaches 165°F. The tenders should be crispy on the outside but still juicy inside—if you cut one open, you'll see that beautiful pink center.
While they bake, prepare the teriyaki glaze by combining the 0.75 cup teriyaki sauce, 2 tbsp honey, 0.5 cup soy sauce, 3 minced garlic cloves, and 1 tbsp freshly grated ginger root in a small saucepan. Bring to a gentle simmer over medium heat and let it reduce by about half, which should take 5-7 minutes. This concentrated glaze will give your tenders that perfect sweet-savory balance.
Glaze and Serve with Perfect Texture
Remove the baked chicken tenders from the oven and transfer them to a serving platter. Immediately drizzle the reduced teriyaki glaze evenly over the top, letting it pool slightly in the center. The residual heat from the chicken will help the glaze set and create that glossy finish we're after.
Let the tenders rest for 2-3 minutes before serving—this brief resting period allows the juices to redistribute, ensuring each bite is perfectly tender. Serve immediately with your favorite dipping sauce or extra glaze on the side. The contrast of crispy exterior and tender interior, combined with that sweet-savory glaze, makes these tenders truly irresistible.
Pro Tips For Making Baked Teriyaki Chicken Tenders
- Pat the chicken dry: The panko won’t stick worth a damn if your chicken is damp—towel it off thoroughly before dredging. I used to skip this, and my first batch always looked sad and clumpy. Trust me, take the 30 seconds.
- Use cold eggs: Whisk your eggs ice cold straight from the fridge—they’ll create a tighter, crispier coating than room-temp eggs. I learned this the hard way when my tenders came out greasy instead of golden. (Yes, even if you’re impatient like me.)
- Don’t overmix the batter: Stir the flour, cornstarch, and egg just until combined—lumps are fine. Overworking it makes the coating gummy. I now use a fork and give it 10 quick stabs; that’s all it needs.
- Bake in batches: Crowd the tray, and you’ll steam the tenders instead of crisp them. Leave at least 1 inch between pieces and bake in single layers. I was skeptical until I tried it—now my kitchen smells like heaven, not a sad takeout knockoff.
Pro cooking tips for perfect results
Breading Secrets
For that signature crispy texture, mix panko breadcrumbs with cornstarch—the cornstarch creates an extra-crunchy barrier while panko adds structure. I press each tender firmly into the mix to ensure even adhesion. Chill the breaded tenders for 15-20 minutes before baking; this step prevents sogginess and locks in crispiness. 🍞
Sauce Reduction
Simmer your teriyaki glaze until it reduces by half—this concentrates the flavors and creates a glossy finish. I use honey and fresh ginger for depth, but store-bought teriyaki works if you add an extra tablespoon of honey.
Reducing the sauce also helps it cling better to the hot tenders after baking. 🍶
Double-Batch Prep
Make extra sauce—it keeps for 1 week in the fridge and freezes well for 3 months. Double the breading mix too; it stays fresh in an airtight container for 3 days.
I like to prep everything the night before so cooking day is just about baking and glazing. 💡
Oven Placement
Bake tenders on the top rack for maximum crispiness—the hotter air at the top helps create that golden-brown crust. Flip them once at the 7-minute mark to ensure even browning. If your oven runs hot, reduce to 375°F to avoid burning. 🔥
Resting Matters
Let tenders rest 2-3 minutes after baking—this lets juices redistribute for maximum tenderness. Serve immediately with extra glaze on the side; the residual heat helps the sauce set beautifully. I always drizzle just before serving to maintain that glossy finish. ✨
Reheating Leftovers
Reheat leftovers in a 350°F oven for 5-7 minutes—this restores some crispiness. Avoid microwaving; it makes breading soggy. For extra crunch, broil for 1-2 minutes at the end. Store leftovers in an airtight container for up to 3 days. 🍗
Nutrition facts
Frequently asked questions
Can I use frozen chicken tenders for this recipe?
Yes, but thaw them completely first in the refrigerator overnight. Never use frozen tenders straight from the freezer—they won't cook evenly and the breading may not crisp properly. Pat them completely dry after thawing to ensure maximum crispiness.
How do I make the teriyaki sauce extra glossy?
Simmer the sauce until it reduces by half, then whisk in 1 teaspoon of cornstarch mixed with 1 tablespoon of water to thicken it further. This creates a silky texture that clings beautifully to the tenders. For extra shine, add a pinch of salt to the finished sauce.
Why did my breading turn out soggy?
Soggy breading usually happens when chicken isn't fully dried or the oven isn't hot enough. Always pat tenders completely dry and preheat your oven to 400°F. Chill breaded tenders for 15-20 minutes before baking to lock in crispiness.
Can I bake these in an air fryer instead?
Air fry at 375°F for 8-10 minutes, shaking halfway. The air fryer creates crispy edges with less oil. Reduce the teriyaki sauce by the same amount (half) before serving to maintain balance.
What's the best way to serve these tenders?
Pair them with steamed rice, roasted vegetables, or a simple side salad. For extra presentation, drizzle with sesame seeds and sliced green onions. The teriyaki glaze works perfectly as a dipping sauce too!