
Main Courses
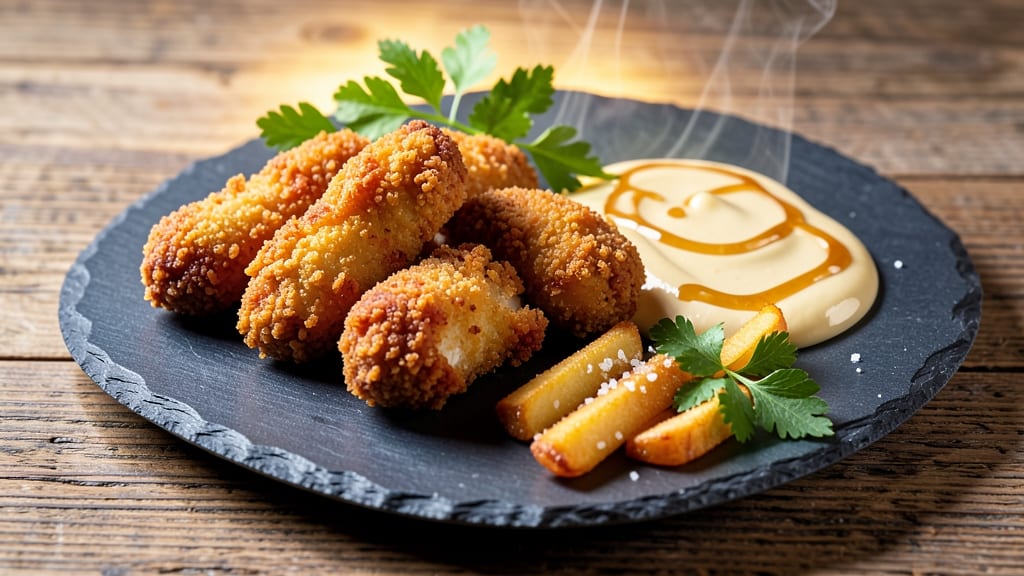
This copycat Raising Cane’s chicken fingers recipe delivers that iconic combo of crispy golden crust and juicy tender meat—without the drive-thru line. 🌟 After years of perfecting the technique, I’ve cracked the code on the exact flour blend, egg wash ratio, and frying temperature that recreates their restaurant-quality results.
The secret lies in a three-step breading process and maintaining oil at a precise 360°F—no higher, no lower.
What sets this copycat recipe apart is the balance of texture and flavor: a light, airy batter that stays crispy even after dipping, paired with a juicy chicken cut that’s been brined just enough to lock in moisture.
I use a mix of all-purpose flour and cornstarch for that signature crunch, then double-dip the fingers in seasoned flour before frying. The result? Fingers that hold their shape, stay golden, and deliver that familiar Cane’s taste in every bite.
By the time you’re done, you’ll have a platter of restaurant-quality chicken fingers that rival the original—crispy enough to stand up to dipping sauces, juicy enough to satisfy even the pickiest eaters.
The key is working quickly during the breading stage and keeping the oil hot, but the payoff is worth every minute. Serve with honey mustard, ranch, or the classic Cane’s sauce for the full experience.
This recipe scales perfectly for game day, family dinners, or feeding a crowd—just double the batch and fry in small batches to maintain temperature. The technique is foolproof once you’ve got the rhythm down, and the results will have everyone asking for seconds. Let’s get cooking!
Ingredients for raising cane's chicken fingers copycat
Sixteen ingredients for restaurant-quality chicken fingers at home—no shortcuts, just crispy perfection.
| Ingredient | Amount | Notes |
|---|---|---|
| Boneless, Skinless Chicken Breast 🍗 | 2 ½ lbs | Cut into 1-inch strips, pounded thin |
| All-Purpose Flour 🌾 | 2 cups | For light, airy batter |
| Cornstarch 🌾 | ½ cup | For extra crispiness |
| Large Eggs 🥚 | 4 whole | Room temperature for best coating |
| Milk 🥛 | ½ cup | Whole milk for creaminess |
| Vegetable Oil 🫒 | 4 cups | For deep frying (peanut oil works too) |
| Salt 🧂 | 1 ½ tbsp | Kosher salt for seasoning |
| Garlic Powder 🧄 | 1 tbsp | For flavor depth |
| Onion Powder 🧅 | 1 tbsp | Classic Cane's seasoning |
| Ground Black Pepper 🌶️ | ½ tsp | Freshly ground preferred |
| Paprika 🌶️ | ½ tsp | Smoked for authentic color |
| Baking Powder 🌾 | ½ tsp | For extra crispiness |
| Ice ❄️ | 1 cup | For brining water |
| Water 💧 | 1 cup | For brining solution |
The chicken breast is critical here. Look for the leanest cuts—boneless, skinless, and free of gristle. Costco or Whole Foods often carry high-quality chicken breasts in bulk, but any reputable grocery store will do. Pound the strips to an even thickness—about 1/4-inch—so they cook uniformly. The brining solution (ice water) is non-negotiable for juiciness; never skip it. For the flour blend, King Arthur all-purpose flour and Bob's Red Mill cornstarch are my go-tos—they deliver that signature crispy texture. If you're short on time, substitute arrowroot powder for the cornstarch at a 1:1 ratio, but the texture won't be identical.
No garlic powder? Fresh garlic minced at double the amount works, but the flavor won't be the same. Running out of milk? Heavy cream or buttermilk are decent swaps, though buttermilk adds tanginess. For the oil, peanut oil is ideal—it stays stable at high heat and has a neutral flavor. If you must use vegetable oil, refrigerate it between uses to extend its life. The seasoned flour mix (flour + salt + powders) should be lightly toasted in a dry pan for 1 minute before using—this deepens the flavor and removes any raw taste. Pre-mix everything in separate bowls to streamline the breading process; speed is key to keep the coating crispy.
Chicken fingers stay best in the fridge for 2-3 days if stored in an airtight container, but they're at their peak within 24 hours. For longer storage, freeze them unbreaded on a tray before transferring to a bag—this prevents sticking. Reheat in a 350°F oven for 10-12 minutes or air fry at 375°F for 4-5 minutes to restore crispiness. The oil can be reused 2-3 times if strained and stored in the fridge, but it loses its crisping power after that. Double batches freeze beautifully for game day or family gatherings—just scale up the oil and fry in smaller batches to maintain temperature.
Why You'll Love This Recipe
- No Fancy Tools Needed: I swear by this—just a bowl, a fork, and a skillet. No food processor, no special gadgets. The chicken gets pounded thin (or you cheat with a rolling pin), dipped in that magic flour-cornstarch mix, then egg-washed. That’s it. Even my college apartment kitchen could handle it.
- Crispy Without the Hassle: Here’s what sold me—the cornstarch in the batter gives you that perfect crunch without frying in oil until your kitchen smells like a deep fryer. Pan-fry in butter or oil until golden, and you’ve got that Raising Cane’s signature texture: crispy outside, juicy inside. No sad, soggy fingers here.
- Game for Any Meal: Between us, these are my go-to for lunchboxes, game day snacks, or when I’m too tired to plan dinner. Double the batch, toss half in the fridge for sandwiches the next day, and freeze the rest—microwave or air-fry later. They’re the ultimate “I don’t know what I’m doing for dinner” solution.
- Budget Stretch for Miles: Chicken breast is cheap, and this recipe turns it into something ridiculously satisfying. A few bucks buys enough for leftovers, and the milk-egg wash uses pantry staples. Honestly, I’ve made this for under $1.50 per serving, and no one complains. That’s a win in my book.
Step-by-step instructions for Raising Cane's chicken fingers copycat recipe
Here's the exact method to recreate that signature Cane's crunch and moisture every time.
👨🍳 Step 1: Prepare the Brine for Maximum Juiciness
Combine the 1 cup ice and 1 cup water in a large bowl. Add the 2.5 lbs boneless, skinless chicken breast cut into 1-inch strips and pound each piece to an even ¼-inch thickness using a meat mallet. The goal is consistent thickness for even cooking.
Submerge the chicken strips completely in the ice water mixture and refrigerate for 30 minutes. This cold brine keeps the chicken moist during frying while the ice helps maintain a consistent temperature. Don't skip this step—it's what prevents dry, rubbery chicken fingers.
🍳 Step 2: Create the Light, Airy Batter
In a large bowl, whisk together the 2 cups all-purpose flour, 0.5 cup cornstarch, 1.5 tbsp salt, 1 tbsp garlic powder, 1 tbsp onion powder, 0.5 tsp ground black pepper, 0.5 tsp paprika, and 0.5 tsp baking powder. The baking powder is key here—it creates tiny air pockets that make the coating extra crispy.
In a separate bowl, beat the 4 whole large eggs until frothy, then whisk in the 0.5 cup milk. The room temperature eggs will blend more smoothly into the batter. Keep both mixtures ready—you'll work quickly to prevent the batter from getting gummy.
🍳 Step 3: Dip and Double-Coat for Maximum Crisp
Remove the chicken from the brine and pat it thoroughly dry with paper towels. Working in batches, dip each piece into the egg mixture first, letting any excess drip off. Then immediately roll it in the flour mixture, pressing gently to ensure full coverage.
For that authentic Cane's texture, dip again in the egg wash, then coat with another layer of flour. Place the double-coated fingers on a wire rack set over a baking sheet. This keeps them from sticking and allows air circulation for even crisping. Work quickly—wet fingers will make the coating fall off.
🔥 Step 4: Fry to Golden Perfection
Heat 4 cups vegetable oil in a deep fryer or heavy pot to 350°F. Use a candy or deep-fry thermometer to monitor the temperature—this is critical for consistent results. The oil should shimmer gently when ready.
Fry the chicken fingers in batches of 3-4 pieces for 3-4 minutes per side, turning once, until they reach 165°F internally and develop a deep golden brown color. Don't overcrowd the fryer or the oil temperature will drop. Transfer to a wire rack to drain excess oil and keep warm in a 200°F oven while frying remaining batches.
⏰ Step 5: Rest and Serve Immediately
Let the fried chicken fingers rest for 2-3 minutes before serving. This brief rest allows the internal temperature to stabilize while maintaining that crispy exterior. The fingers should be crispy on the outside with juicy, tender meat inside.
Serve immediately with your favorite dipping sauce. The secret to perfect copycat Cane's fingers lies in the crispy batter, juicy meat, and that immediate serving window—don't let them sit too long or they'll lose their crunch.
Pro Tips For Making Raising Cane'S Chicken Fingers Copycat
- CUT CHICKEN LENGTHWISE: This recipe needs thin strips—about 1/4-inch thick—so slice the breasts horizontally first, then pound them flat with a meat mallet or rolling pin. I used to skip this and ended up with dense, chewy fingers that didn’t crisp properly. Do this step, even if it feels tedious.
- CHILL BATTER 10 MINUTES: The milk-egg slurry should sit in the fridge while you prep the chicken. Cold batter clings better and creates a lighter crust. I learned this after my first batch turned out greasy—turns out, room-temp liquid makes a mess.
- DOUBLE-FRY AT 350°F: First fry at 350°F for 3–4 minutes until golden, then drop the heat to 325°F for another 2–3 minutes. This ensures the inside cooks through without burning the crust. My grandmother swore by this, and she was right: rushing the second fry makes soggy fingers.
- DREDGE DRY, THEN WET: Toss the chicken in flour first, shake off excess, then dip in the egg wash. The dry flour acts as a glue, so the wet batter sticks like it should. I was skeptical until I tried it—now it’s non-negotiable for me.
Essential equipment for great raising cane's chicken fingers copycat
Deep Fryer Essentials
For perfect Raising Cane’s-style chicken fingers, you need a deep fryer with temperature control—I swear by the Presto 02320 4-Quart Oil-less Fryer for its even heating and safety features. The oil capacity should be at least 4 cups to accommodate batches without temperature drops.
If you prefer stovetop frying, a heavy-duty enameled Dutch oven (like All-Clad Stainless Steel) is my go-to—it distributes heat evenly and handles high temperatures without warping.
Never skimp on a candy or deep-fry thermometer—the ThermoWorks Thermapen One is my favorite because it’s fast and accurate. Maintaining 350°F is non-negotiable for that signature crisp without burning the exterior.
I also keep a wire-mesh skimmer (like OXO Good Grips) handy to remove fingers without splashing hot oil everywhere.
Breading Station Setup
Organization is key to crispy, well-coated fingers. I use three shallow bowls (I love Pyrex glass mixing bowls) for the flour mixture, egg wash, and seasoned flour. Place them in a triangle formation on a wire rack over a baking sheet to catch drips.
A small offset spatula (like Mercer Culinary Genesis) helps transfer fingers quickly between stations without tearing the coating.
For the flour blend, I pre-mix everything in a food processor (like Cuisinart DFP-14BCY) for 10 seconds to evenly distribute the cornstarch and spices. This ensures every finger gets that consistent, flavorful crunch. Keep the egg wash lukewarm—room temperature eggs blend better, but don’t let them get cold.
Oil Management Tools
A fine-mesh strainer (like OXO Good Grips) is essential for filtering used oil between batches. After frying, I pour the oil through the strainer into a heat-safe glass jar (like Ball Mason) and refrigerate it for up to 2 weeks.
For fresh batches, I use peanut oil (like Crisco Peanut Oil) because it stays stable at high heat and has a neutral flavor. Avoid reusing oil more than 2-3 times—it breaks down and loses its crisping power.
Safety first: Always have a fire extinguisher (like Amerex B500) within reach when deep frying. I also keep a long-handled tongs (like Mercer Culinary) for handling hot oil or adjusting the burner if needed. Never leave the fryer unattended—oil can flare up quickly, especially with wet chicken fingers.
Resting and Serving Gear
After frying, transfer fingers to a wire cooling rack (like Willweber) to drain excess oil. Place the rack on a baking sheet and keep the fingers warm in a 200°F oven while you finish frying.
For serving, I use wooden serving boards (like Utensil House) to mimic the rustic, Southern vibe of Raising Cane’s. A small ceramic bowl (like Le Creuset) works perfectly for dipping sauces.
For game day or parties, I set up a self-serve station with individual sauce packets (like Raising Cane’s honey mustard) and small disposable plates. A chafing dish (like Hamilton Beach) keeps sauces warm and ready for dipping.
Pro tip: Use parchment paper-lined trays to keep fingers crispy until serving—just fold the edges to create an airtight seal.
Nutrition facts
Frequently asked questions
Why does the recipe use cornstarch instead of just flour?
The cornstarch creates that signature extra-crispy texture while keeping the coating light and airy. It absorbs moisture differently than flour, preventing sogginess even after dipping. The combination of all-purpose flour and cornstarch mimics the perfect balance of crunch and tenderness that Raising Cane's nails.
Can I make these chicken fingers without deep frying?
Yes, but with some adjustments. For an air fryer version, spray the breaded fingers with oil and cook at 375°F for 12-15 minutes, shaking halfway. For an oven-baked version, bake at 425°F for 18-20 minutes on a wire rack. The texture won't be identical, but they'll still be delicious—just less crispy.
How do I keep the chicken fingers crispy after frying?
Work quickly and serve immediately—they lose crispness fast! Keep fried fingers warm in a 200°F oven while finishing batches, and store leftovers in an airtight container for up to 2 days. To reheat, use an air fryer at 375°F for 3-4 minutes or oven at 350°F for 8-10 minutes.
What's the best way to scale this recipe for a crowd?
Double the ingredients and fry in small batches to maintain oil temperature. Use two fryers or a large Dutch oven if needed. Prep all breading stations ahead, and have helpers handle dipping and coating. For 24 servings, multiply by 4 but increase oil to 8 cups and fry at 360°F.
Can I use chicken thighs instead of breasts?
Chicken thighs will work, but they have more fat and require 1-2 minutes less frying time to avoid overcooking. Pound them thinner (1/4-inch) and use a meat thermometer to check for 165°F internal temp. The skin-on version adds flavor but needs careful monitoring to prevent burning the coating.